Run an iOS Simulator
Your iOS instance is ready. For provisioning, see the Quickstart; for builds, see Build with remote Xcode.
Connect to your instance
Open a WebSocket client to drive the instance.
- TypeScript covers the full device-control surface (every method on this page).
- Go covers most of the same methods. See the SDK capability matrix for the exact list.
- Python only ships the control plane (create, list, delete instances). For taps, screenshots, and other device actions from Python, drive the device through the CLI or raw REST.
import { Ios } from '@limrun/api';

const client = await Ios.createInstanceClient({
  apiUrl: instance.status.apiUrl!,
  token: instance.status.token,
  logLevel: 'info',         // 'none' | 'error' | 'warn' | 'info' | 'debug'
});

console.log('UDID:', client.deviceInfo.udid);
console.log('Screen:', client.deviceInfo.screenWidth, client.deviceInfo.screenHeight);
import (
"context"
limrun "github.com/limrun-inc/go-sdk"
"github.com/limrun-inc/go-sdk/option"
iosws "github.com/limrun-inc/go-sdk/websocket/ios"
)
lim := limrun.NewClient(option.WithAPIKey(os.Getenv("LIM_API_KEY")))
inst, _ := lim.IosInstances.New(ctx, limrun.IosInstanceNewParams{
Wait: param.NewOpt(true),
ReuseIfExists: param.NewOpt(true),
})
client, err := iosws.NewClient(inst.Status.APIURL, inst.Status.Token)
if err != nil { panic(err) }
defer client.Close()Or from the CLI:
# The CLI maintains its own connection per command. No explicit client step.
lim ios screenshot ./out.png
The TypeScript and Go clients initialize differently:
- TypeScript:
Ios.createInstanceClient(...)returns once the WebSocket is open andclient.deviceInfois populated. - Go:
iosws.NewClient(...)returns immediately; the first device call blocks until the WebSocket opens.
Where the URLs come from
The instance status carries everything you need:
| Status field | Use |
|---|---|
apiUrl | HTTP base for the device daemon. Pass to the control client. |
token | Per-instance bearer for apiUrl, endpointWebSocketUrl, and sandbox.xcode.url. Embedded in signedStreamUrl. |
endpointWebSocketUrl | WebSocket endpoint for the <RemoteControl /> web component (pass with ?token=). |
signedStreamUrl | Console-hosted watch URL with the token embedded; open in a browser without your API key. |
mcpUrl | Per-instance MCP HTTP endpoint. Auth with the per-instance status.token, not your org API key. See MCP. |
sandbox.xcode.url | Xcode sandbox API URL (only when spec.sandbox.xcode.enabled: true). |
targetHttpPortUrlPrefix | Reverse-proxy prefix for tunneled HTTP ports on the device. |
state | unknown → creating → assigned → ready → terminated. |
Read the screen
Before any action, read what's actually on the screen. The element tree is the source of truth for what's interactable; the screenshot is the fastest visual sanity check.
const tree = await client.elementTree();
// tree: ElementTreeNode[] (recursive accessibility hierarchy)
// fields per node: AXLabel, AXUniqueId, AXValue, role, type, title, traits, frame, children

const shot = await client.screenshot();
// { base64: string, width: number, height: number }
treeJSON, err := client.ElementTree(ctx, nil) // raw JSON; parse with encoding/json
shot, err := client.Screenshot(ctx) // shot.Base64, shot.Width, shot.HeightOr from the CLI:
lim ios element-tree
lim ios element-tree --json | jq '.[] | select(.AXLabel == "Continue")'
lim ios screenshot ./out.png
Screenshot dimensions are in points, the same coordinate space as tap(x, y). If you want to tap based on a coordinate in a screenshot's pixel space (e.g. when the screenshot was scaled), use tapWithScreenSize:
await client.tapWithScreenSize(x, y, screenshotWidth, screenshotHeight);Tap
Prefer accessibility selectors. They survive layout changes; coordinates don't.
// By accessibility identifier (most stable)
await client.tapElement({ AXUniqueId: 'startButton' });

// By label
await client.tapElement({ AXLabel: 'Save' });

// By label contains (case-insensitive)
await client.tapElement({ AXLabelContains: 'continue' });

// By type + label
await client.tapElement({ type: 'Button', AXLabel: 'Done' });

// By coordinates (last resort)
await client.tap(201, 450);
// Selector field names differ slightly from TypeScript:
// AccessibilityID, Label, LabelContains, ElementType, Title, TitleContains, Value
_, err := client.TapElement(ctx, iosws.AccessibilitySelector{
AccessibilityID: "startButton",
})
_, err = client.TapElement(ctx, iosws.AccessibilitySelector{
Label: "Save",
})
_, err = client.TapElement(ctx, iosws.AccessibilitySelector{
ElementType: "Button",
Label: "Done",
})
err = client.Tap(ctx, 201, 450)Or from the CLI:
lim ios tap-element --ax-unique-id startButton
lim ios tap-element --ax-label "Save"
lim ios tap-element --ax-label-contains continue
lim ios tap-element --type Button --ax-label "Done"
lim ios tap 201 450
AccessibilitySelector accepts AXUniqueId, AXLabel, AXLabelContains, type, title, titleContains, and AXValue (TypeScript field names; Go uses AccessibilityID, Label, LabelContains, ElementType, Title, TitleContains, and Value for the same fields). All non-empty fields must match (AND, not OR).
Steppers, sliders, and text values
For controls that aren't tapped but adjusted, use the element-targeted variants:
await client.incrementElement({ AXLabel: 'Volume' });
await client.decrementElement({ AXLabel: 'Volume' });
await client.setElementValue('42', { AXLabel: 'Count' });   // faster than typing char-by-char
Type and press keys
Type into the currently focused field, press individual keys with optional modifiers, or toggle the on-screen keyboard. toggleKeyboard is the equivalent of pressing ⌘K in the simulator.
await client.typeText('hello world');                   // types into focused field
await client.typeText('[email protected]', true);       // pressEnter = true
await client.pressKey('enter');
await client.pressKey('a', ['shift']);                   // modifiers: shift, command, control, alt
await client.toggleKeyboard();
err := client.TypeText(ctx, "hello world", false)
err = client.TypeText(ctx, "[email protected]", true) // pressEnter
err = client.PressKey(ctx, "enter")
err = client.PressKey(ctx, "a", "shift")
// toggleKeyboard is TypeScript-only today.Or from the CLI:
lim ios type "hello world" --enter
lim ios press-key enter --modifier shift
lim ios toggle-keyboard
Scroll and orientation
scroll is a finger-swipe gesture. pixels is the gesture distance in points; coordinate (TS only) defaults to the screen center; momentum (0.0-1.0) controls fling decay. setOrientation flips the device between portrait and landscape.
await client.scroll('down', 300);
await client.scroll('up',   300, { coordinate: [200, 400], momentum: 0.4 });

await client.setOrientation('Portrait');
await client.setOrientation('Landscape');
Or from the CLI:
lim ios scroll down --amount 300Open URLs and deep links
openUrl works for both web URLs and registered deep-link schemes.
await client.openUrl('https://apple.com');               // opens in Safari
await client.openUrl('myapp://orders/42');               // deep link into your app
Or from the CLI:
lim ios open-url "myapp://orders/42"Run a batch of actions
When a sequence shouldn't have a round-trip between each step, use performActions. The server runs the whole batch inside the pod, stops on the first failure, and reports per-action results. This is the pattern agents reach for once they're driving anything more than a single tap.
const result = await client.performActions(
  [
    { type: 'tapElement', selector: { AXLabel: 'Continue' } },
    { type: 'wait', durationMs: 500 },
    { type: 'typeText', text: 'hello', pressEnter: true },
    { type: 'scroll', direction: 'down', pixels: 300 },
    { type: 'pressKey', key: 'enter' },
  ],
  { timeoutMs: 10_000 },
);
// result.results is per-action
Or from the CLI:
lim ios perform \
  --action 'type=tapElement,selector={"AXLabel":"Continue"}' \
  --action type=wait,durationMs=500 \
  --action "type=typeText,text=hello,pressEnter=true"
Action type values:
- High-level (one-to-one with the single-action methods):
tap,tapElement,incrementElement,decrementElement,setElementValue,typeText,pressKey,scroll,toggleKeyboard,openUrl,setOrientation,wait. - Raw HID (for custom gestures):
touchDown,touchMove,touchUp,keyDown,keyUp,buttonDown,buttonUp.
Hardware button values: home, lock, side, applePay, softwareKeyboard.
Multi-touch and custom gestures
The raw HID primitives let you build gestures with precise timing. Pair touchDown + touchMove + touchUp with wait actions to simulate long-presses, flings with custom inertia, or anything the higher-level scroll doesn't cover:
const cx = client.deviceInfo.screenWidth / 2;
const startY = 600;
const endY = 200;

await client.performActions([
  { type: 'touchDown', x: cx, y: startY },
  { type: 'wait', durationMs: 30 },
  { type: 'touchMove', x: cx, y: startY - 100 },
  { type: 'touchMove', x: cx, y: startY - 200 },
  { type: 'touchMove', x: cx, y: endY },
  { type: 'touchUp',   x: cx, y: endY },
]);
Install, launch, and terminate apps
Install from a URL or local file, launch by bundle ID, terminate when you're done. listApps enumerates what's already on the device, system apps included.
const apps = await client.listApps();
// [{ bundleId, name, installType }, ...]

await client.launchApp('com.example.MyApp');
await client.launchApp('com.example.MyApp', 'RelaunchIfRunning');
await client.terminateApp('com.example.MyApp');

// Install from a URL (md5 enables server-side caching)
await client.installApp('https://...build.zip', {
  md5: '...',
  timeoutMs: 120_000,
  launchMode: 'ForegroundIfRunning',
});
apps, err := client.ListApps(ctx)
// []InstalledApp{ BundleID, Name, InstallType }
err = client.LaunchApp(ctx, "com.example.MyApp")
result, err := client.InstallApp(ctx, "https://...build.zip", &iosws.AppInstallationOptions{
MD5: "...",
LaunchMode: "ForegroundIfRunning",
})
// terminate-app is TypeScript-only today; fall back to `lim ios terminate-app` or REST.Or from the CLI:
lim ios list-apps
lim ios launch-app com.example.MyApp --mode RelaunchIfRunning
lim ios terminate-app com.example.MyApp
lim ios install-app ./MyApp.app.zip
lim ios install-app https://... --md5 abc... --launch-mode ForegroundIfRunning
Reset app data between runs
Between test cases or scenario reruns, wipe the app's data container and relaunch it. Faster than uninstalling and reinstalling.
await client.softReset('com.example.MyApp');                       // strategy: 'data' (default)
await client.softReset('com.example.MyApp', { strategy: 'full' }); // also clears caches, keychain, and privacy grants
// returns: { strategy, bundleId, itemsCleared?, durationMs }
Read app logs
Tail the last N lines once, or stream live. The stream emits one line event per log line (batched ~500ms server-side), plus error and close.
// One-shot tail
const tail = await client.appLogTail('com.example.MyApp', 200);

// Stream live
const stream = client.streamAppLog('com.example.MyApp');
stream.on('line', (line) => console.log(line));
stream.on('error', console.error);
stream.on('close', () => console.log('stream closed'));
stream.stop();   // unsubscribe when done
Or from the CLI:
lim ios app-log com.example.MyApp --tail 200
lim ios app-log com.example.MyApp --follow
Record a video
Recordings run server-side. quality accepts the integers 5 through 10; the server default is 5. Save to a local file, hand the bytes to a presigned URL, or both.
await client.startRecording({ quality: 5 });
// ... drive the UI ...
const downloadUrl = await client.stopRecording({ localPath: '/tmp/demo.mp4' });
// or:
await client.stopRecording({ presignedUrl: '<your-s3-upload-url>' });
Or from the CLI:
lim ios record start --quality 5
# ... drive the UI ...
lim ios record stop -o /tmp/demo.mp4
# or upload directly:
lim ios record stop --presigned-url "<url>"
Reverse-tunnel a local service
The simulator runs remotely, but the app inside it sometimes needs to reach a service that runs on your side: a mock backend, a debug proxy, a test runner, or a local Expo dev server for hot-reload. A reverse tunnel solves this: the remote simulator opens an outbound connection that Limrun multiplexes back over a WebSocket to a TCP service on your machine, so a service on your laptop, CI runner, or private network appears local to the app, with no public tunnel and no inbound firewall holes.
Note the direction: this tunnel is simulator → your service (outbound from the device).
Reaching a server running inside the simulator from the outside (WebDriverAgent, for example) is the opposite direction and a separate feature: the reverse proxy via targetHttpPortUrlPrefix. See Appium for how that's used and the status URL surface in the SDK reference.
const tunnel = await client.startReverseTunnel({
  remotePort: 57090,           // must be in 57090..57099
  localPort: 57090,            // defaults to remotePort
  localHost: '127.0.0.1',      // defaults to 127.0.0.1
});
// The app reaches your service at tunnel.remoteAddress, e.g.
// `${tunnel.remoteAddress.address}:${tunnel.remoteAddress.port}`.
// That address is an internal listener IP near the simulator, not 127.0.0.1.
// tunnel.close() to tear it down.
Or from the CLI, which prints that same address (the SDK's tunnel.remoteAddress) on start:
lim ios reverse 57090:57090            # expose local :57090 as simulator :57090
lim ios reverse 57091 --local-host 0.0.0.0
The remote port must be in 57090-57099. That range is reserved for tunneled services. A few constraints apply:
- Client-first services only. The app inside the simulator initiates the connection. Server-first protocols, where the server speaks first, aren't supported.
- No auto-reconnect. The tunnel is fail-closed: if the underlying WebSocket drops, the listener and its active connections tear down. Restart the tunnel to recover.
- TypeScript SDK and CLI only. Not available in the Go or Python SDKs. See the SDK capability matrix.
- Android equivalent. This primitive is iOS-only. On Android, use
adb reverseover the ADB tunnel.
Expo and Metro hot-reload
A common use is hot-reloading a React Native app from a local Metro dev server. This assumes a development build (the app bundles expo-dev-client), which is what most apps with native modules run. You open the installed dev client through its custom scheme and point it at Metro over the tunnel.
Two details are specific to Limrun, both stemming from the reserved port range. Metro defaults to port 8081, which is outside 57090-57099, so run it on a port within the range and map both sides of the tunnel to that same port. Matched ports matter: with a mismatched mapping such as 57090:8081, Expo can advertise more than one packager URL, and the simulator ends up fetching from the local port it cannot reach, so bundles load only intermittently.
Advertise the tunnel's simulator-facing host to Metro with REACT_NATIVE_PACKAGER_HOSTNAME, using the host only, with no port. The variable is hostname-only; appending a port yields a broken URL like http://<host>:57090:8081. The matched --port is what puts Metro on the tunnel port.
lim ios reverse and expo start both run in the foreground until you stop them with Ctrl+C, so run each in its own terminal. On start, lim ios reverse prints the simulator-facing host:
lim ios reverse 57090:57090
# Remote endpoint: 10.244.x.x:57090   # the host to use below
Set HOST to the address it printed, then reuse it below. Open the dev client through your app's scheme (the scheme in app.json, or exp+<slug> if it has none):
# Second terminal: set HOST to the address printed above, then start Metro
# on the matched port, advertising that host.
HOST=10.244.x.x
REACT_NATIVE_PACKAGER_HOSTNAME=$HOST npx expo start --dev-client --host lan --port 57090

# Third terminal (with HOST set): open the dev client pointed at the tunnel.
# The url query is the URL-encoded form of http://$HOST:57090.
lim ios open-url "<scheme>://expo-development-client/?url=http%3A%2F%2F$HOST%3A57090"
For CI, this is more reliable than expo start --tunnel (ngrok): no external service, and none of the session closed failures. Limrun's automatic PR preview Action installs full app builds rather than running dev-server hot-reload, so it does not use this path.
Drop into macOS dev tools
When the high-level API doesn't cover what you need, the instance exposes a small set of macOS dev tools as escape hatches.
// Streaming simctl
const exec = client.simctl(['listapps', 'booted']);
exec.on('line-stdout', (line) => console.log(line));
exec.on('line-stderr', (line) => console.error(line));
const { code } = await exec.wait();

// One-shot xcrun (limited to --sdk / --show-* flags)
const { stdout } = await client.xcrun(['--sdk', 'iphonesimulator', '--show-sdk-version']);

// xcodebuild version only
await client.xcodebuild(['-version']);

// Upload a file to the simulator sandbox (returns the in-sandbox path)
const remotePath = await client.cp('config.json', '/local/path/to/config.json');

// Inspect open UNIX sockets
const sockets = await client.lsof();
// simctl mirrors os/exec.Cmd; pipe to your own writers or buffer the output.
cmd := client.Simctl(ctx, "listapps", "booted")
cmd.Stdout = os.Stdout
cmd.Stderr = os.Stderr
if err := cmd.Run(); err != nil { panic(err) }
// Inspect open UNIX sockets
sockets, err := client.Lsof(ctx)
// xcrun, xcodebuild, and cp are TypeScript-only today.Or from the CLI:
lim ios simctl -- listapps booted
lim ios xcrun  -- --sdk iphonesimulator --show-sdk-version
lim ios cp config.json /local/path/to/config.json
lim ios lsof
Reuse and clean up instances
Each iOS instance is single-tenant. Only one client should drive it at a time, so scope instances per user, per PR, or per session with labels. reuseIfExists returns the same instance on the next call with the same labels, which keeps a long-running agent on one warm pod instead of churning through fresh ones.
The pattern matters when a platform integrator triggers create from a UI action: without reuseIfExists, a tight loop on the user's side fans out into hundreds of instances (and a real-world bill). With it, repeated clicks settle on the same warm pod.
// Reuse the same instance for the same session across multiple agent runs
const instance = await lim.iosInstances.create({
  wait: true,
  reuseIfExists: true,
  metadata: { labels: { session: sessionId, user: userId } },
});
Tear down explicitly when you're done:
await lim.iosInstances.delete(instance.metadata.id);lim ios delete <id> # or `lim ios delete` for the last-createdOr clean up by label selector:
const stale = await lim.iosInstances.list({ labelSelector: `user=${userId}`, state: 'ready' });
for await (const inst of stale) {
await lim.iosInstances.delete(inst.metadata.id);
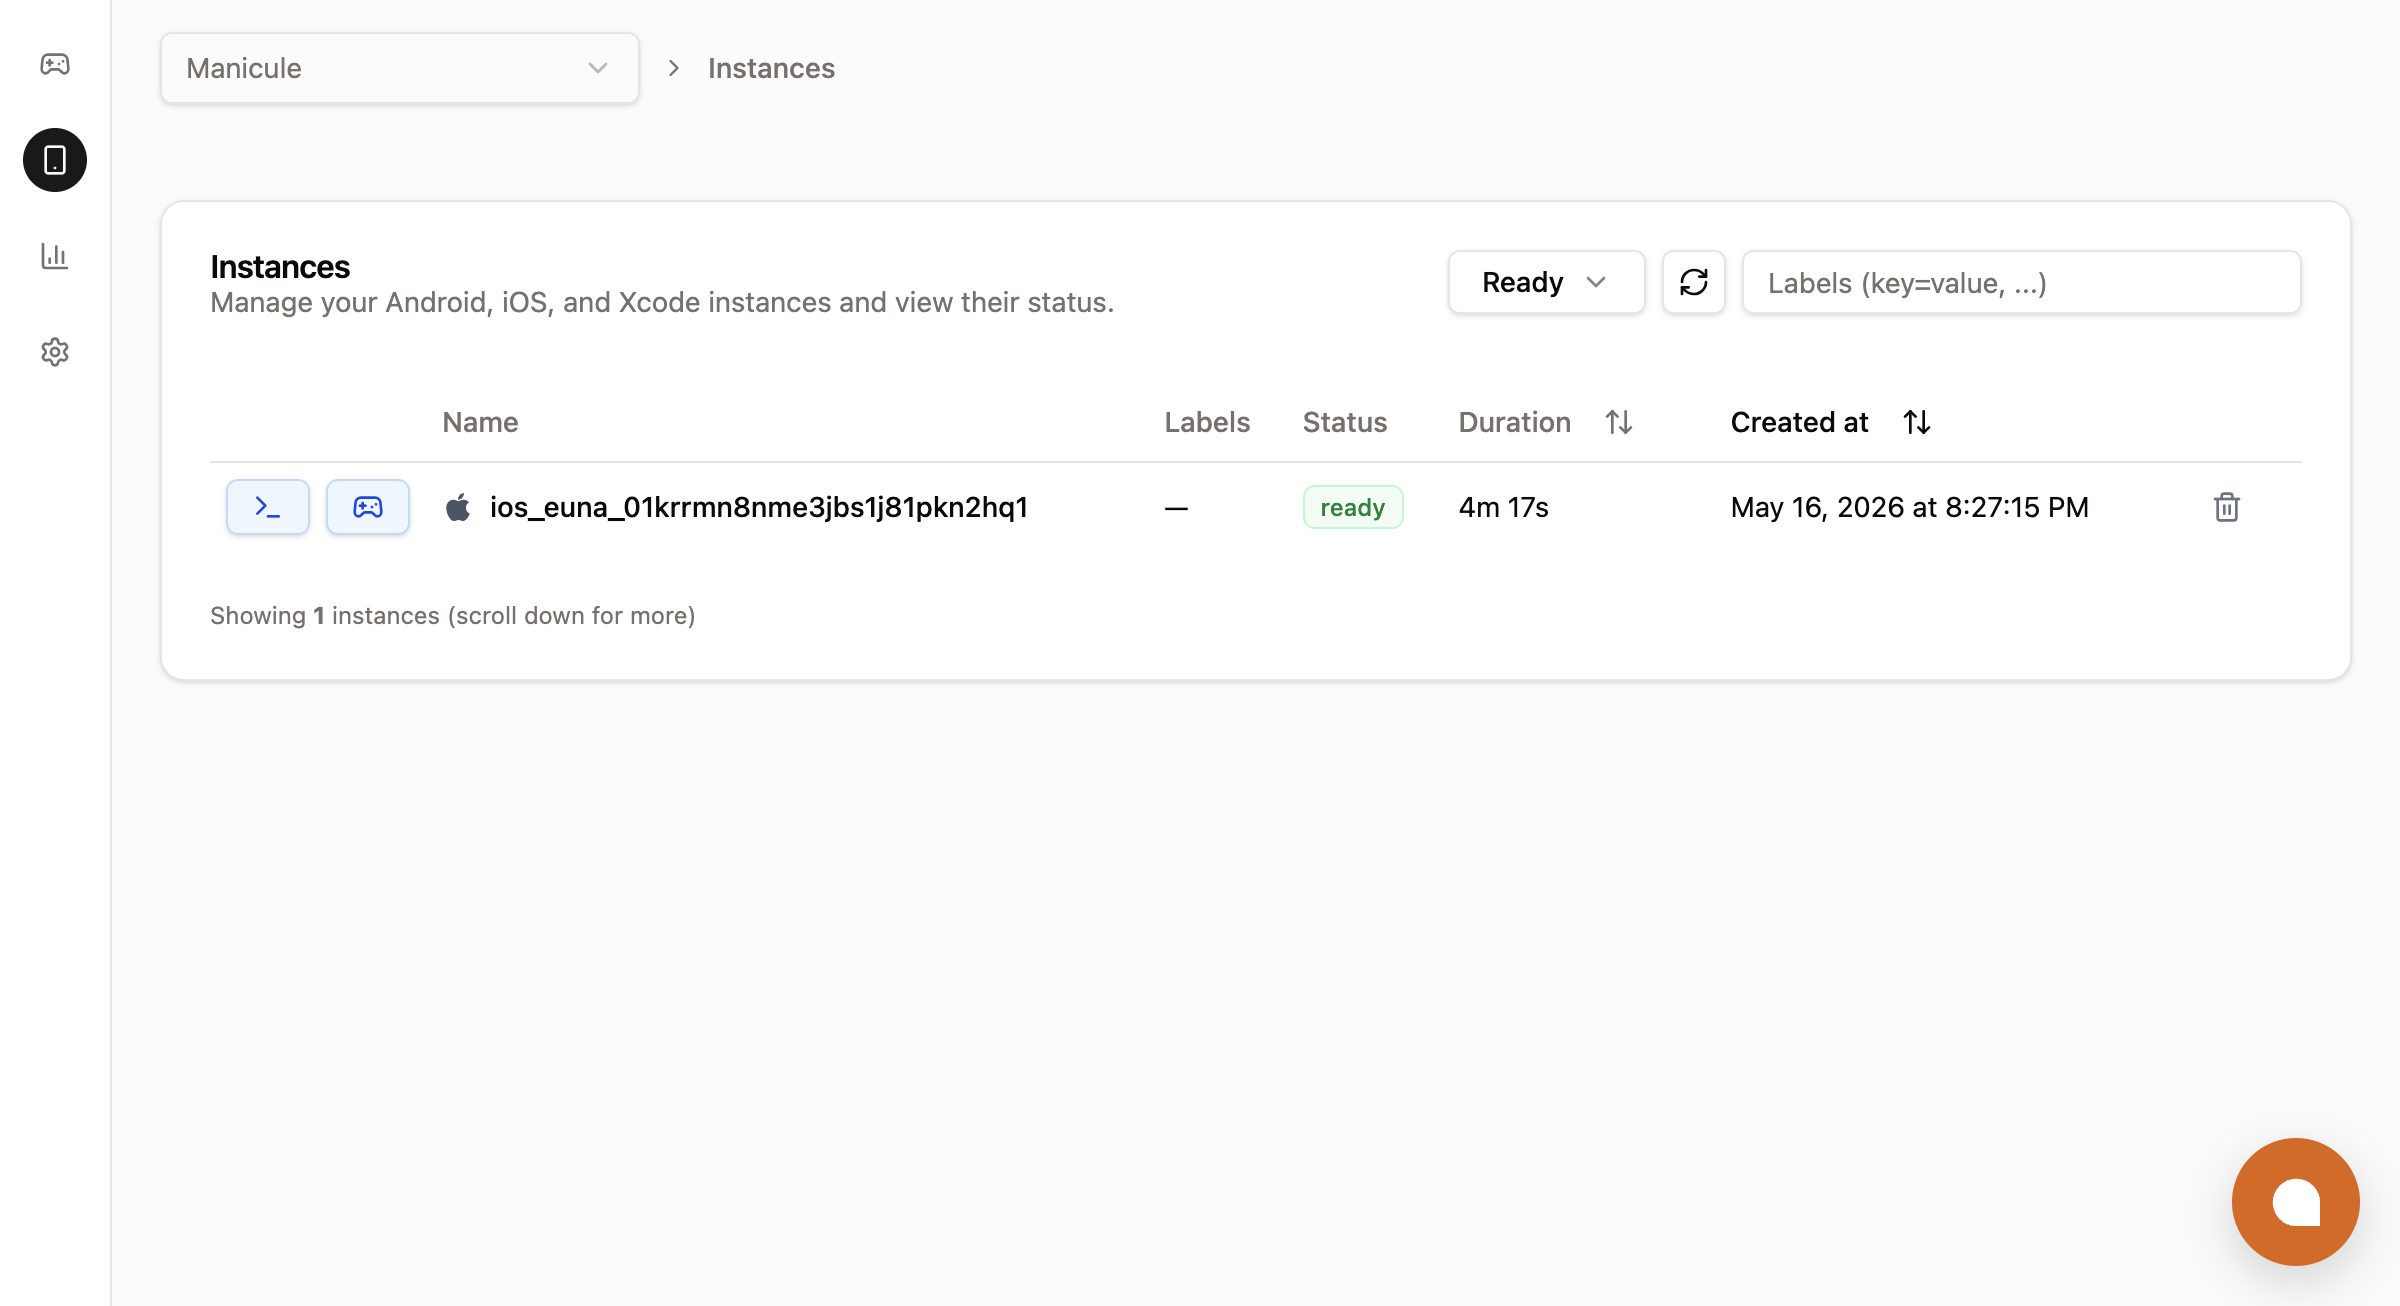
}The console's Instances tab shows the same data in a UI. Filter by state, filter by label selector, sort by duration or created-at, and re-attach to any ready instance with one click:
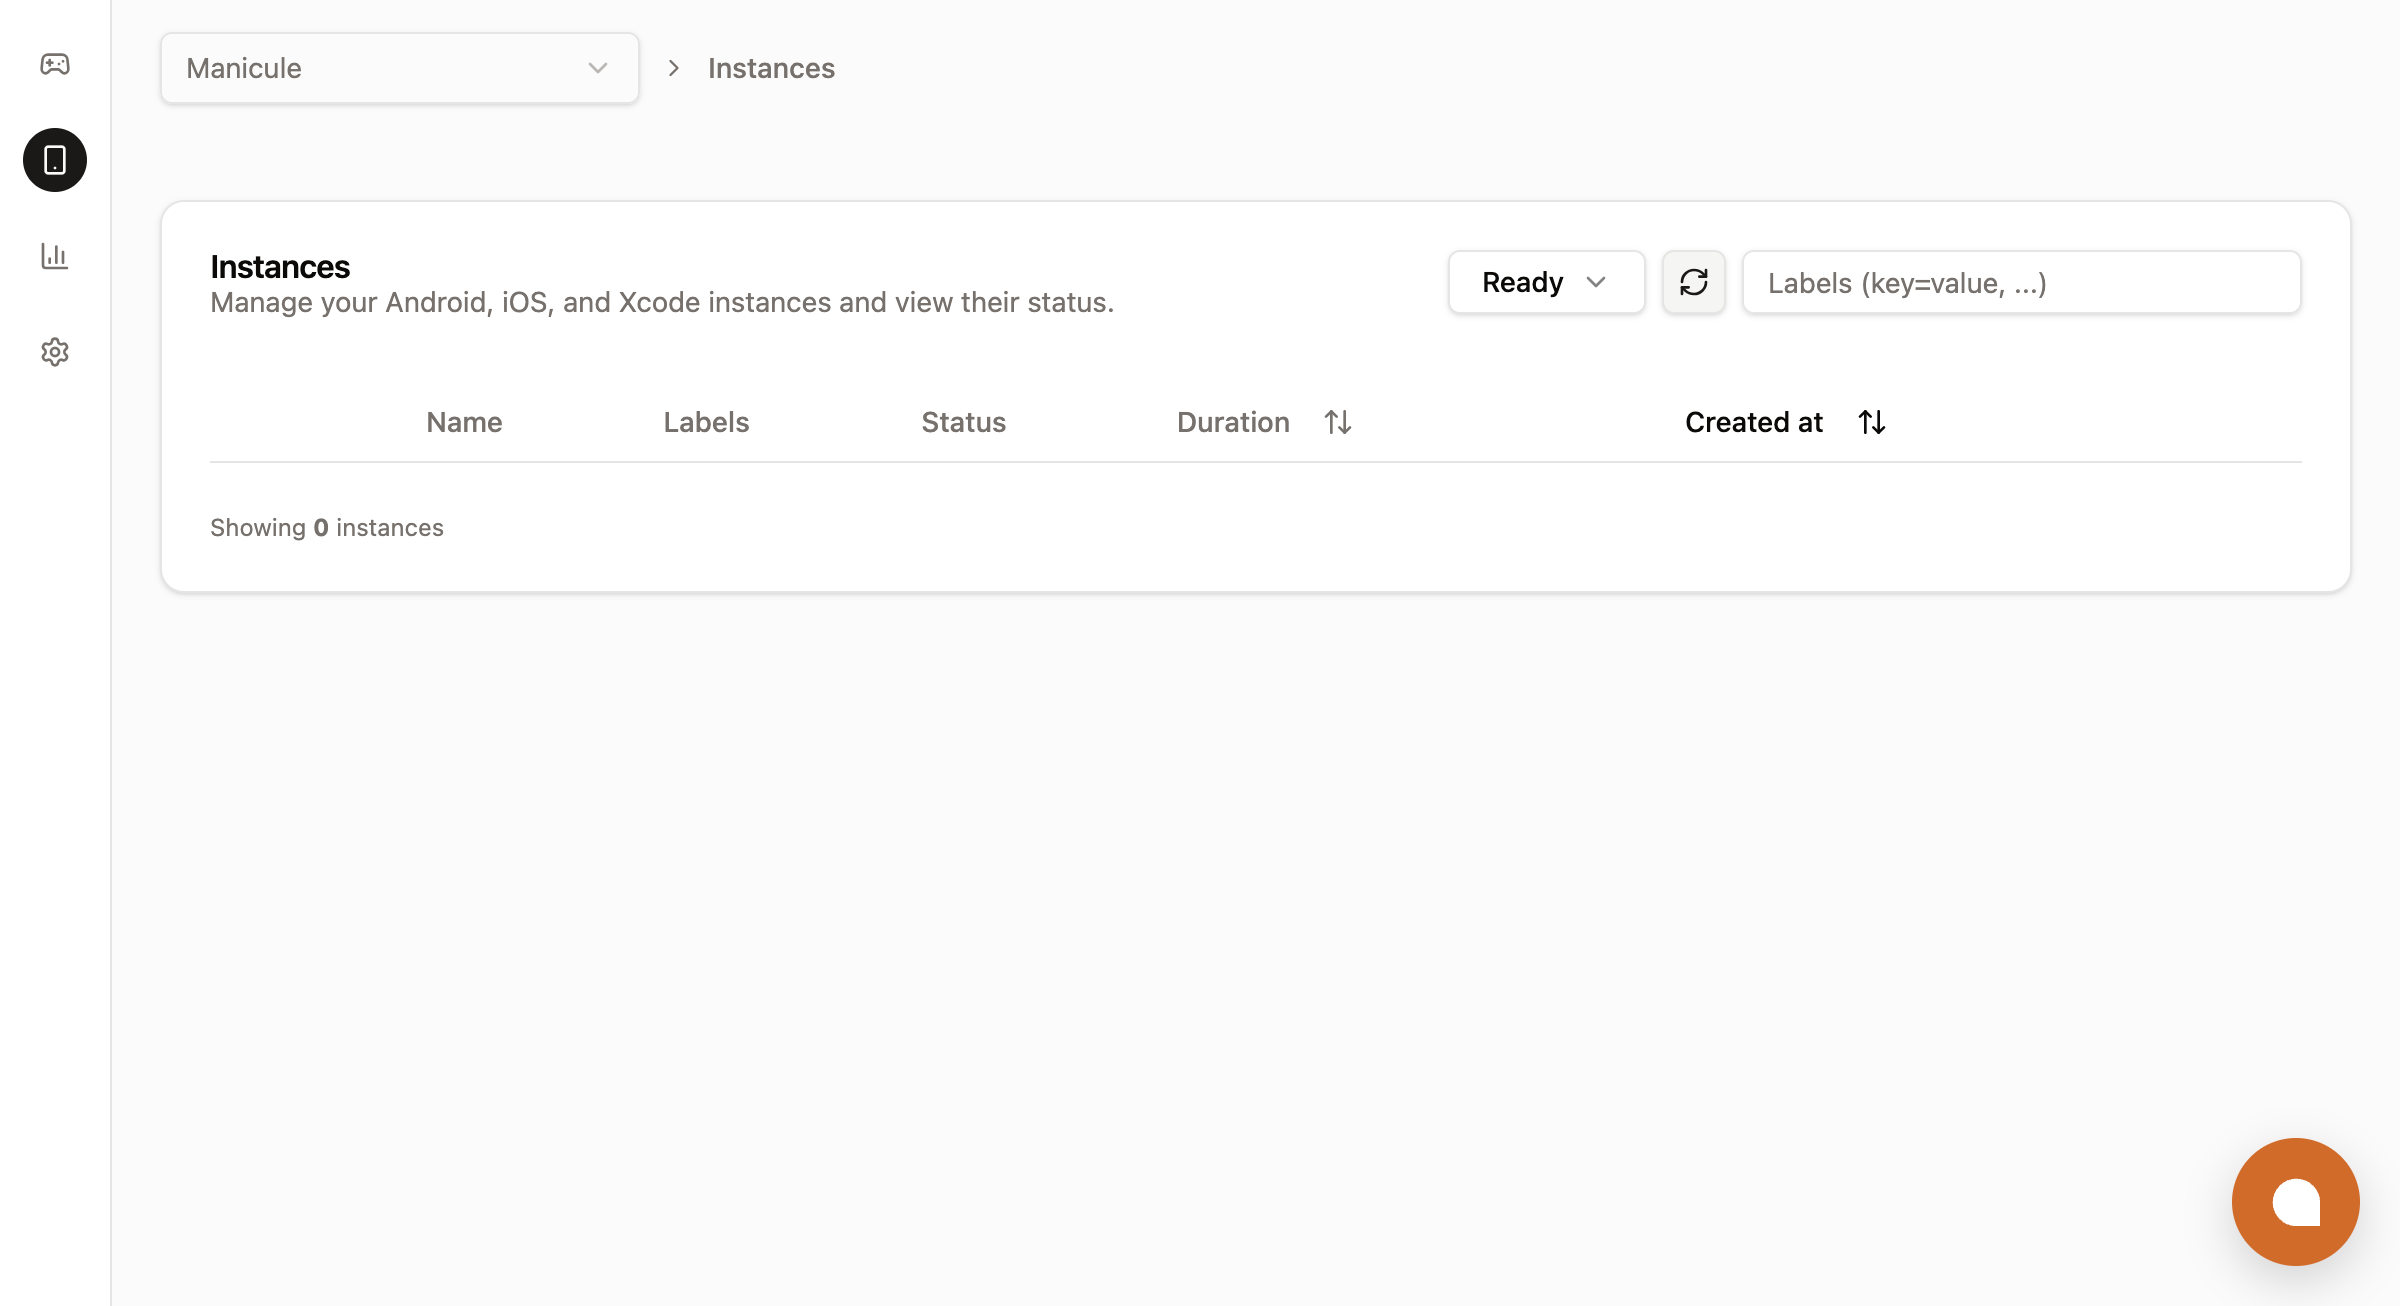
After a delete (or after the inactivity timeout fires), the row disappears from the Ready filter. Switching the filter to All shows the same instance in terminated state until it ages out:
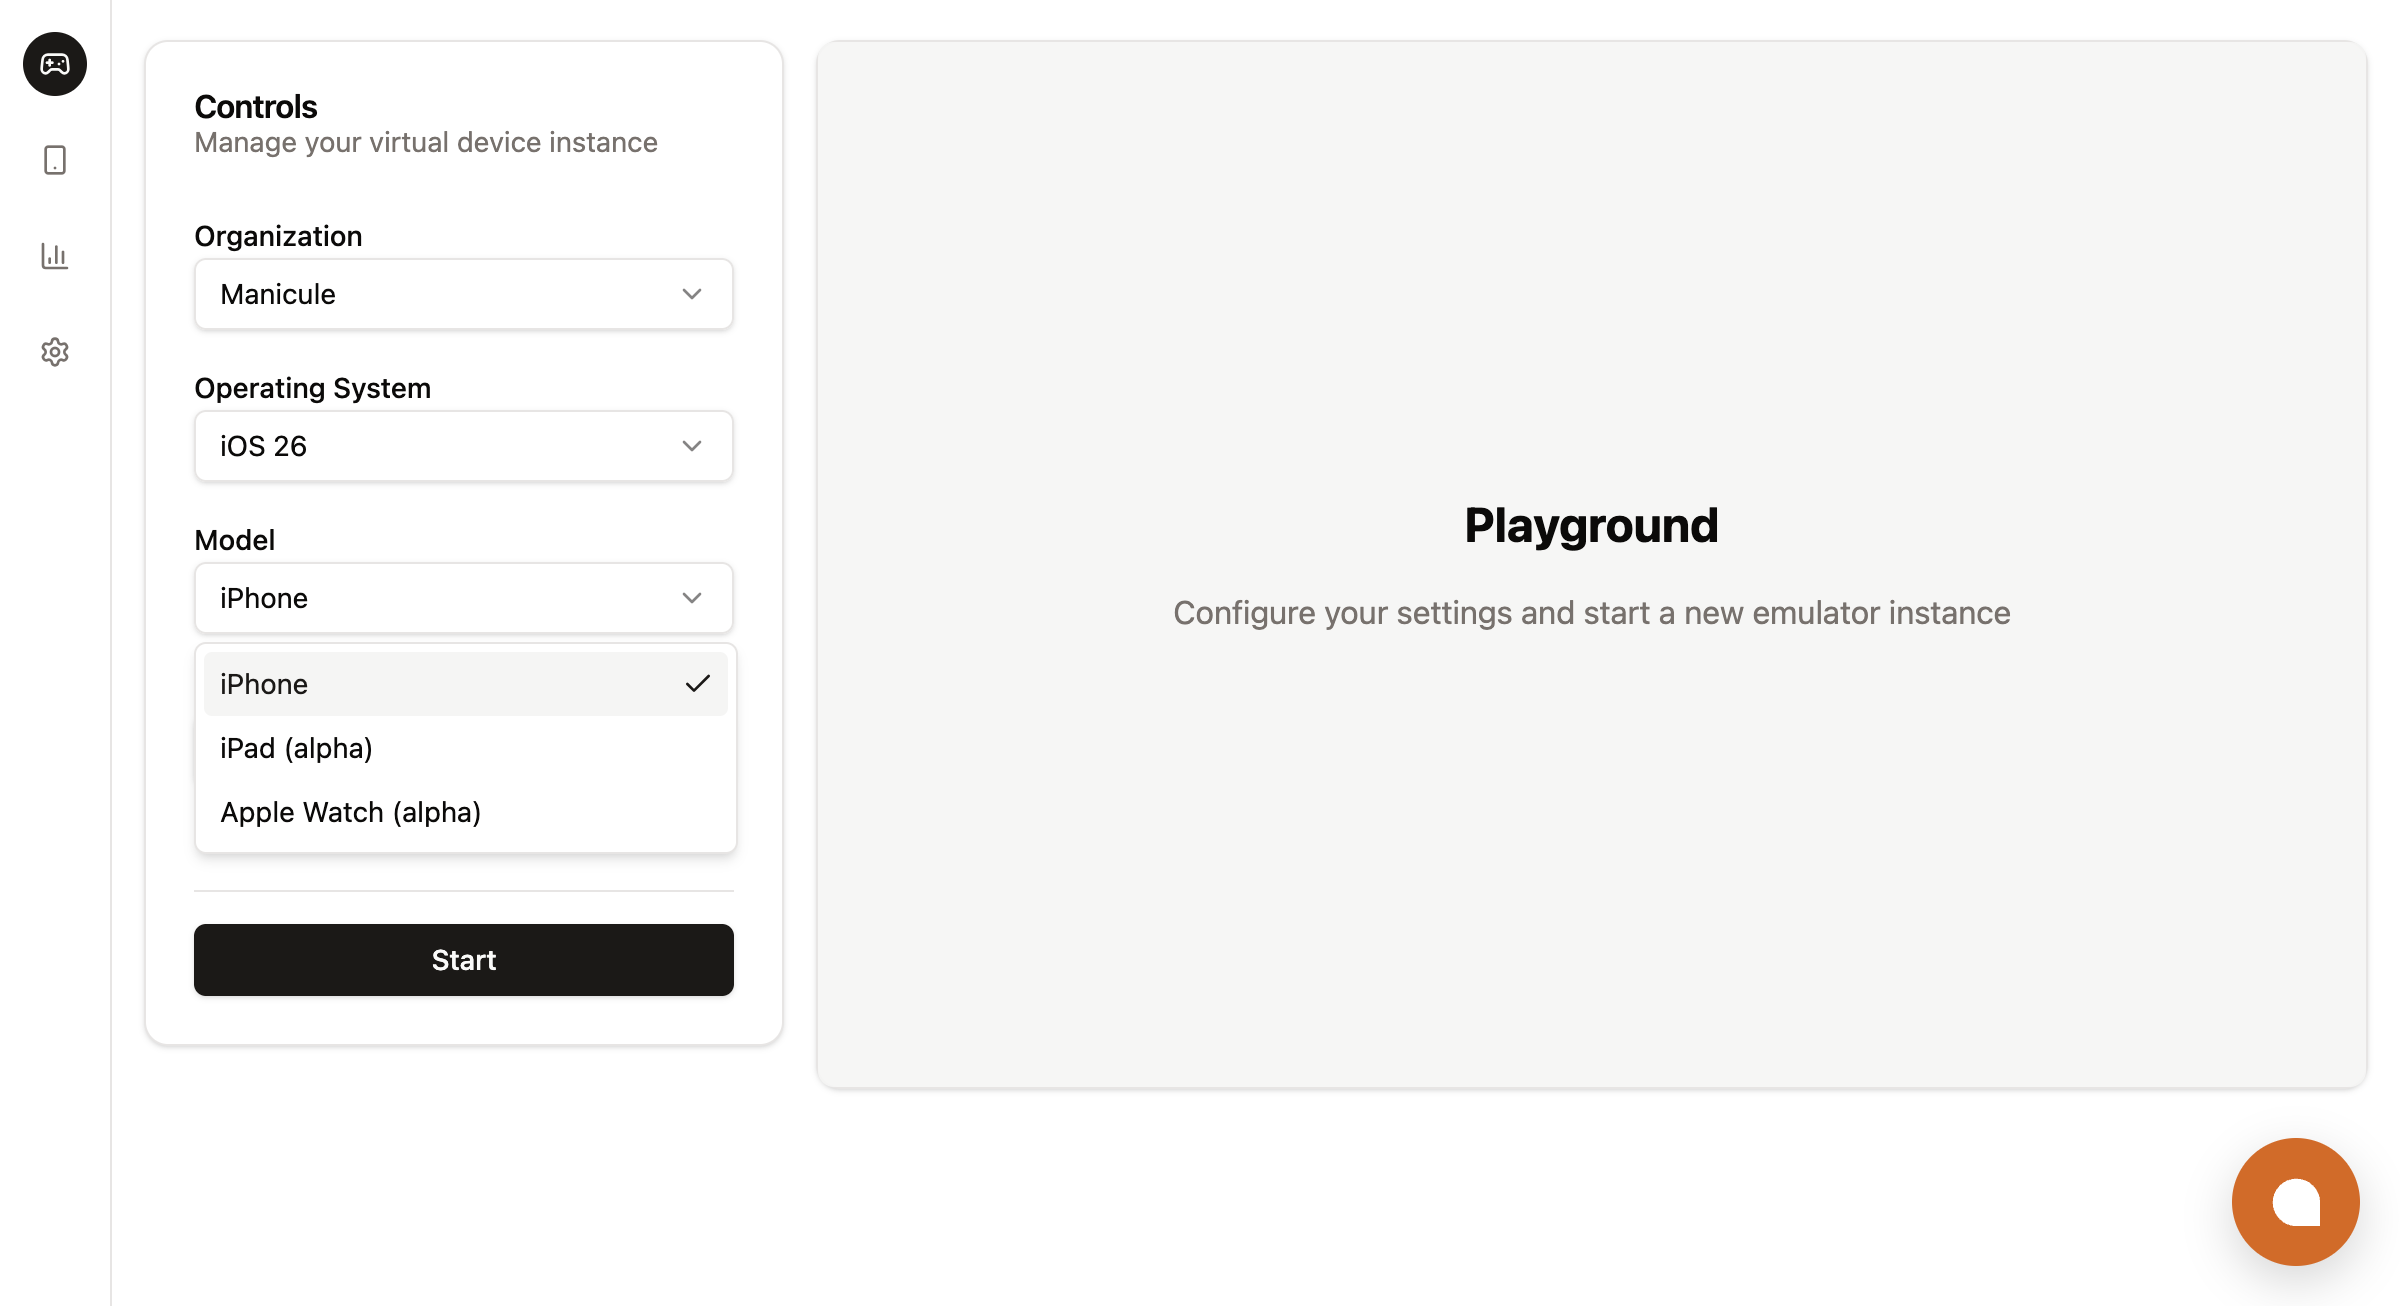
Configure the instance
By default, instances are an iPhone in a nearby region with a server-applied inactivity timeout. To pick a different model, pin a region, pre-install an app, or attach an Xcode build sandbox, pass spec.* at create time:
const instance = await lim.iosInstances.create({
  wait: true,
  reuseIfExists: true,
  metadata: {
    labels: { app: 'my-app', session: 'demo' },
  },
  spec: {
    model: 'iphone',                    // 'iphone' | 'ipad' | 'watch'
    region: 'us-west',
    inactivityTimeout: '10m',           // '1m' | '10m' | '3h' | ...
    hardTimeout: '0',                   // '0' = no hard cap
    clues: [{ kind: 'ClientIP', clientIp: '203.0.113.42' }],
    initialAssets: [
      { kind: 'App', source: 'AssetName', assetName: 'my-app-build.zip', launchMode: 'ForegroundIfRunning' },
    ],
    sandbox: { xcode: { enabled: true } },
  },
});
instance = client.ios_instances.create(
wait=True,
reuse_if_exists=True,
metadata={"labels": {"app": "my-app", "session": "demo"}},
spec={
"model": "iphone", # "iphone" | "ipad" | "watch"
"region": "us-west",
"inactivity_timeout": "10m",
"hard_timeout": "0",
"clues": [{"kind": "ClientIP", "client_ip": "203.0.113.42"}],
"initial_assets": [
{
"kind": "App",
"source": "AssetName",
"asset_name": "my-app-build.zip",
"launch_mode": "ForegroundIfRunning",
},
],
"sandbox": {"xcode": {"enabled": True}},
},
)// The Go SDK does not expose `model` on the create params yet.
// Instances default to iPhone. To pick iPad or Apple Watch, use the CLI or REST.
instance, err := lim.IosInstances.New(ctx, limrun.IosInstanceNewParams{
Wait: param.NewOpt(true),
ReuseIfExists: param.NewOpt(true),
Metadata: limrun.IosInstanceNewParamsMetadata{
Labels: map[string]string{"app": "my-app", "session": "demo"},
},
Spec: limrun.IosInstanceNewParamsSpec{
Region: param.NewOpt("us-west"),
InactivityTimeout: param.NewOpt("10m"),
HardTimeout: param.NewOpt("0"),
Sandbox: limrun.IosInstanceNewParamsSpecSandbox{
Xcode: limrun.IosInstanceNewParamsSpecSandboxXcode{
Enabled: param.NewOpt(true),
},
},
},
})Or from the CLI:
lim ios create --reuse-if-exists \
  --model iphone \
  --region us-west \
  --inactivity-timeout 10m \
  --label app=my-app --label session=demo \
  --install-asset my-app-build.zip \
  --xcode
spec reference
| Field | Type | Meaning |
|---|---|---|
model | 'iphone' | 'ipad' | 'watch' | Apple Simulator model. Defaults to iphone. |
region | string | Pin region (e.g. us-west). Otherwise scheduled by clues + availability. |
inactivityTimeout | duration string | 1m, 10m, 3h. Default comes from your org settings. Passing 0 is equivalent to omitting it. |
hardTimeout | duration string | Forced termination. Default 0 = no hard cap. |
clues | array | Scheduling hints. { kind: 'ClientIP', clientIp } picks a region close to the end user. |
initialAssets | array | Apps to install at boot. See Asset Storage. |
sandbox.xcode.enabled | boolean | Attach an Xcode build sandbox. See Build with remote Xcode. |
metadata.labels is free-form key=value and powers reuseIfExists, listing, and cleanup queries.
For platform integrators: pass the end user's IP as a ClientIP clue (clues: [{ kind: 'ClientIP', clientIp: '203.0.113.42' }]). The scheduler places the instance in a region close to that IP, which is the difference between a snappy embedded simulator and a laggy one across continents.
Next steps
Build with remote Xcode
Produce the build that gets installed onto the simulator.
Automatic PR Previews
Ship every PR with a built app and a live preview link, straight from a GitHub workflow.
Embed the simulator
Render the simulator in your web app with <RemoteControl />.
Test in-app purchases
StoreKit local testing without an Apple Account or sandbox tester (advanced).
Was this guide helpful?