Run an Android emulator
There are two ways in. The lim CLI and the TypeScript SDK give you typed device control: selectors, screenshots, recordings. An ADB tunnel makes the emulator look like a USB device, so Android Studio, Appium, scrcpy, and your own scripts attach to it unchanged.
Before you start
You need the lim CLI or an SDK and an API key in LIM_API_KEY; the Quickstart sets up the CLI and SDKs and REST API lists the SDK packages.
To use the ADB tunnel, install adb. It ships with the Android SDK Platform-Tools, which the Android Studio command-line tools install. The CLI's shell, log, and file commands work without it.
The three SDKs cover different parts of the Android surface. TypeScript has the full device-control client. Python and Go create and manage instances, and drive the device over the ADB tunnel. The SDK capability matrix lists every capability per language.
Create an emulator
Create an instance and set its labels and Android OS version:
# Boot an instance and open an ADB tunnel (on by default).
lim android create

# Delete the instance when this CLI process exits, keep it in the US, and label it.
lim android create --rm --jurisdiction us --label app=demo --label session=docs

# Pick the OS version and device model.
lim android create --os-version 15 --model tablet

# Pre-install a local APK (uploaded to Asset Storage first, MD5-deduplicated).
lim android create --install ./build.apk

# Pre-install an APK that is already in Asset Storage.
lim android create --install-asset chrome-stable
import { Limrun } from '@limrun/api';
const lim = new Limrun(); // reads LIM_API_KEY from the environment
const instance = await lim.androidInstances.create({
wait: true,
reuseIfExists: true,
metadata: { labels: { app: 'demo', session: 'docs' } },
spec: {
jurisdiction: 'us', // optional; hard constraint on where the instance runs
inactivityTimeout: '10m', // 1m, 10m, 3h, ...
hardTimeout: '0', // '0' = no hard cap
clues: [{ kind: 'OSVersion', osVersion: '15' }],
},
});
console.log(instance.metadata.id, instance.status.state);from limrun_api import Limrun
lim = Limrun() # reads LIM_API_KEY
instance = lim.android_instances.create(
wait=True,
reuse_if_exists=True,
metadata={"labels": {"app": "demo", "session": "docs"}},
spec={
"inactivity_timeout": "10m",
"hard_timeout": "0",
"clues": [{"kind": "OSVersion", "os_version": "15"}],
},
)import (
"context"
"os"
limrun "github.com/limrun-inc/go-sdk"
"github.com/limrun-inc/go-sdk/option"
"github.com/limrun-inc/go-sdk/packages/param"
)
lim := limrun.NewClient(option.WithAPIKey(os.Getenv("LIM_API_KEY")))
ctx := context.Background()
inst, err := lim.AndroidInstances.New(ctx, limrun.AndroidInstanceNewParams{
Wait: param.NewOpt(true),
ReuseIfExists: param.NewOpt(true),
Metadata: limrun.AndroidInstanceNewParamsMetadata{
Labels: map[string]string{"app": "demo", "session": "docs"},
},
Spec: limrun.AndroidInstanceNewParamsSpec{
InactivityTimeout: param.NewOpt("10m"),
HardTimeout: param.NewOpt("0"),
Clues: []limrun.AndroidInstanceNewParamsSpecClue{
{Kind: "OSVersion", OsVersion: param.NewOpt("15")},
},
},
})
if err != nil {
panic(err)
}The CLI output includes the instance ID and a console URL that opens the live device stream in your browser. In the SDKs, wait: true returns once the instance is ready, and reuseIfExists: true (CLI: --reuse-if-exists) returns an existing instance with the same labels instead of creating a new one (see Labels and reuse).
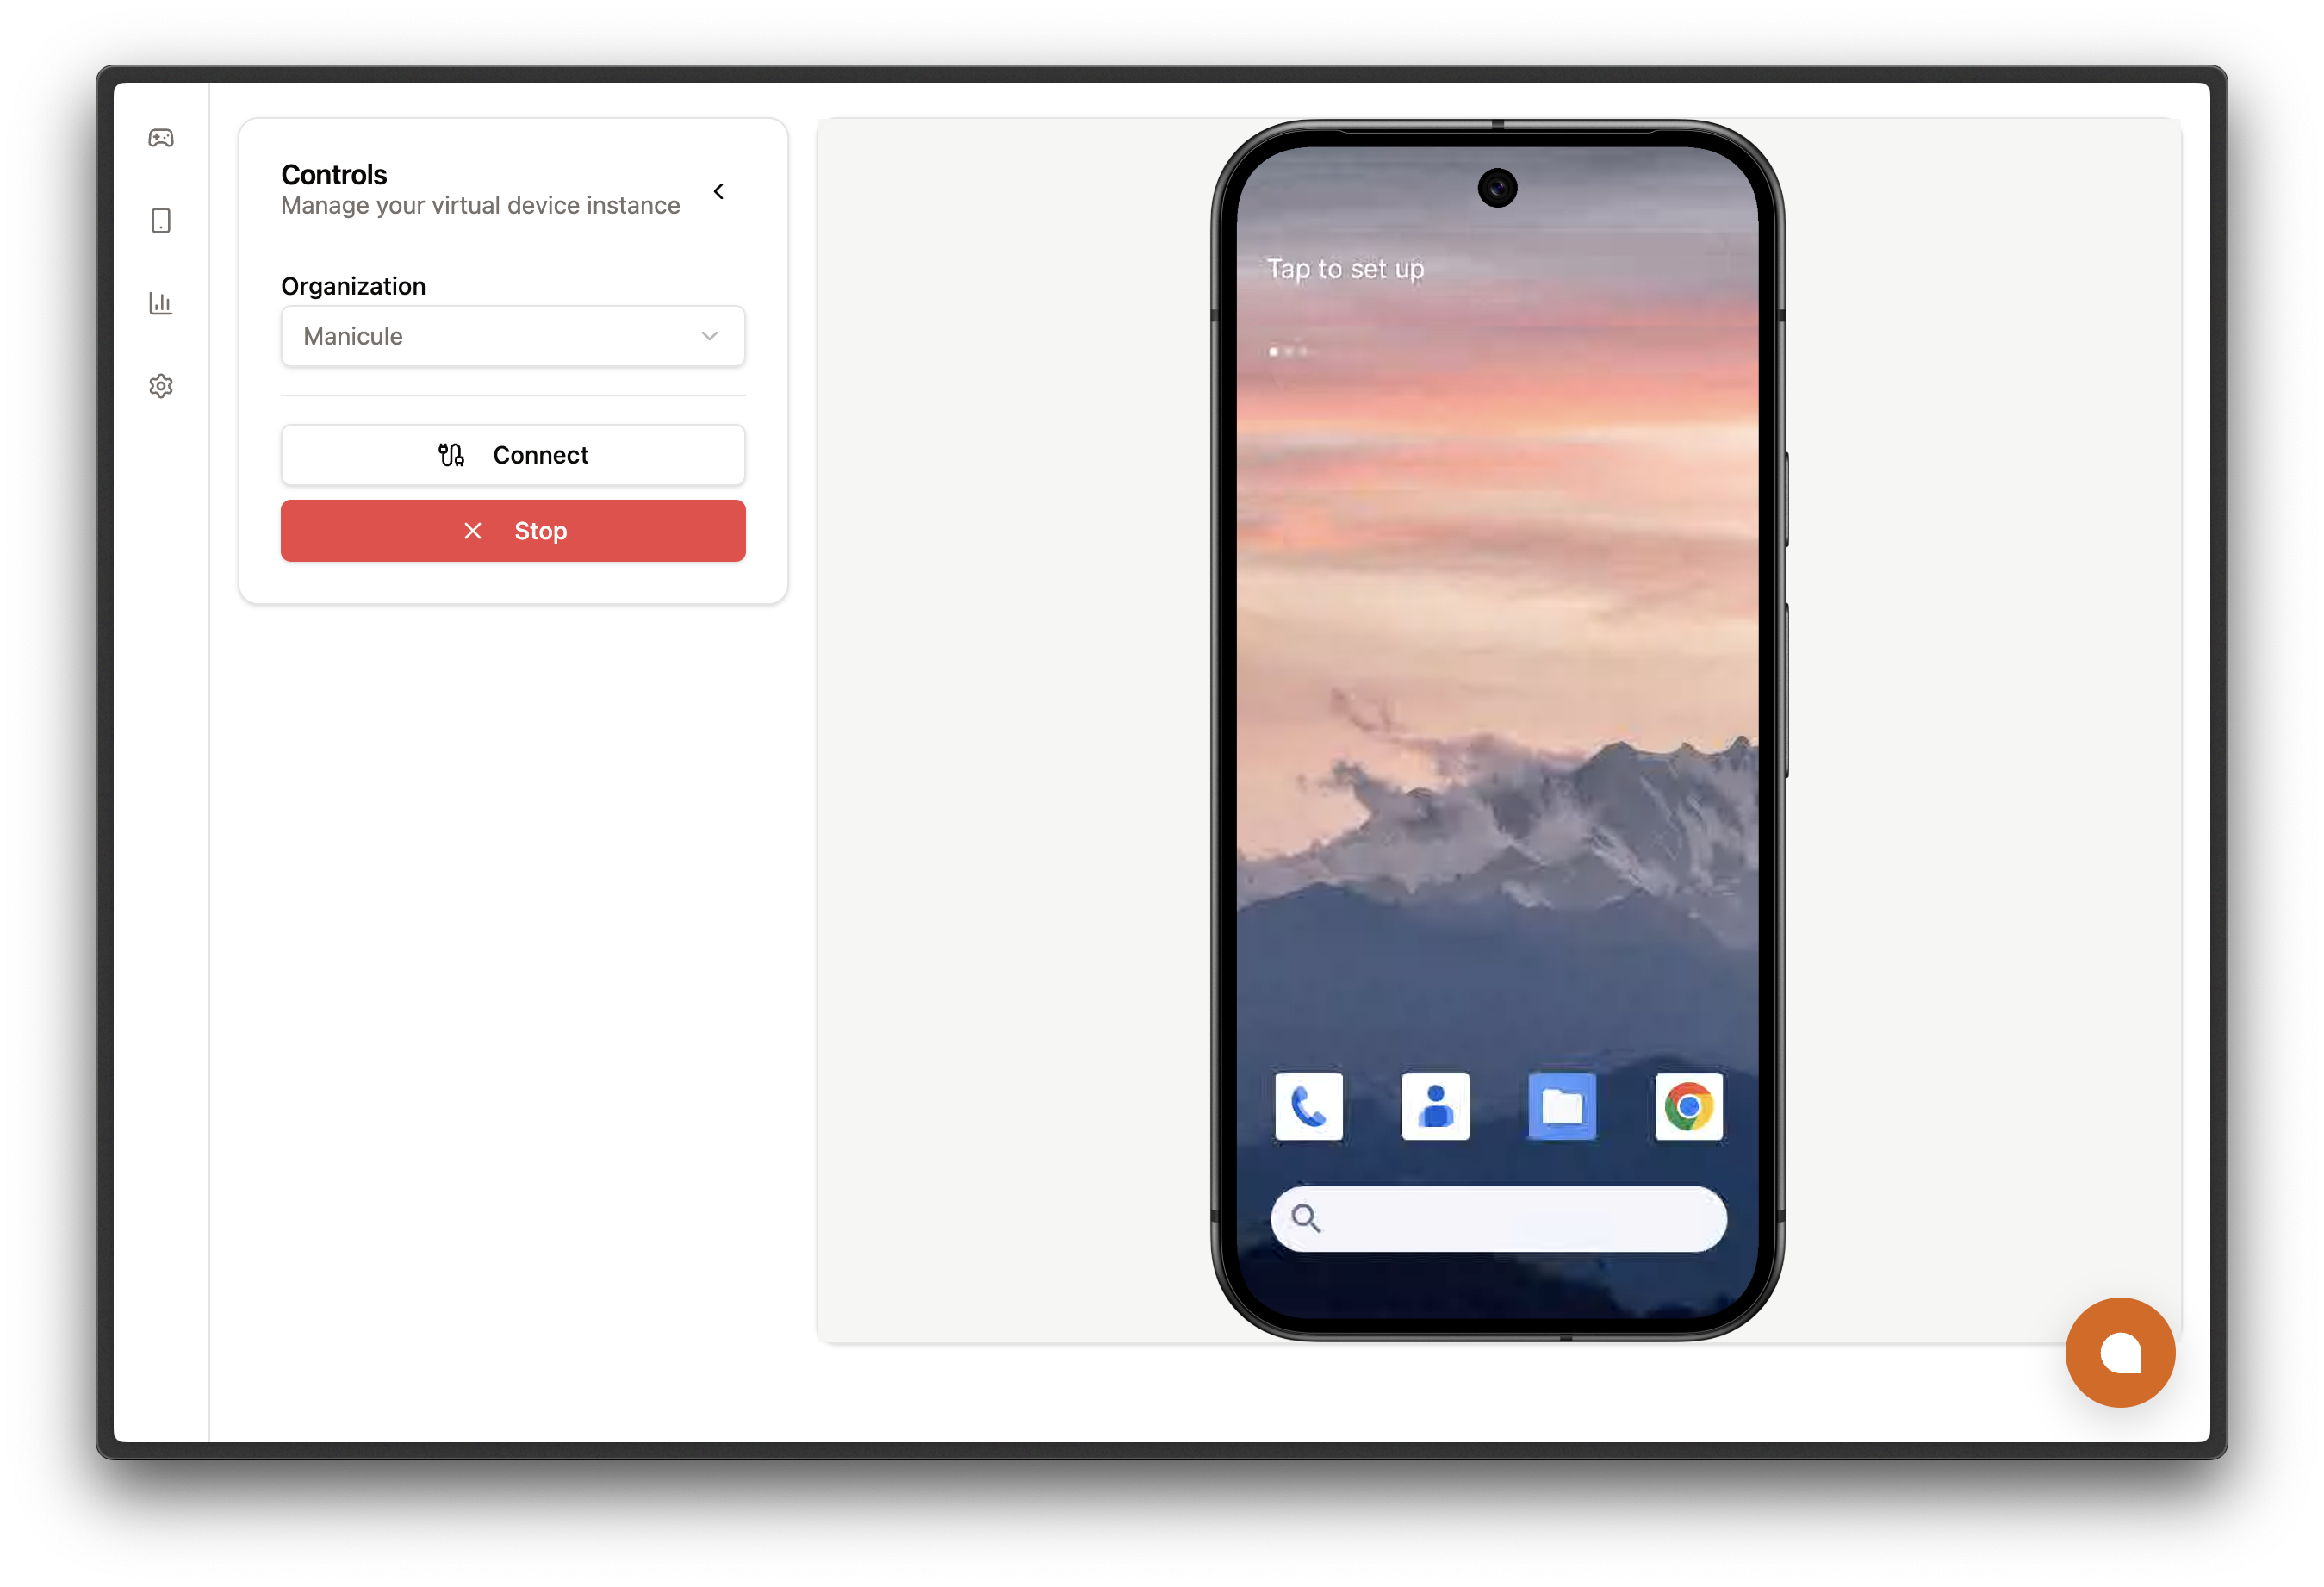
To watch the emulator, open the instance's signed stream URL (status.signedStreamUrl) in any browser; it carries its own token, so no sign-in or API key is needed. To show the device inside your own web app, see Embed a device. Every field the create call returns is described in Instance spec and status.
Create options
Flags for lim android create:
| Flag | What it does |
|---|---|
--jurisdiction us|eu|as | Keep the instance inside one jurisdiction. Hard constraint: creation fails when no region there has capacity. |
--region <name> | Deprecated. A region preference such as us-east1: tried first, overflows to other regions when full. Use --jurisdiction. |
--os-version 14|15 | Android OS major version. Defaults to 15. |
--model phone|tablet | Android device model. Defaults to phone. |
--display-name <name> | Human-readable name shown in listings and the console. |
--label key=value | Attach a metadata label. Repeat for multiple labels. |
--reuse-if-exists | Return the existing instance with exactly the same labels instead of creating a new one. Looked up in the region that handles the create. |
--inactivity-timeout <duration> | Inactivity timeout (1m, 10m, 3h). Without the flag, your organization's Android default applies. The maximum is 24h. |
--hard-timeout <duration> | Forced termination after this wall-clock window. Defaults to no cap. |
--install <path> | Upload a local APK and install it while provisioning. Repeatable. See Pre-install APKs. |
--asset-ttl <duration> | Expiry for files uploaded by --install, as a Go duration (24h, minimum 1m). Does not affect --install-asset. Defaults to no expiry. |
--install-asset <name> | Install an APK that is already in Asset Storage. Repeatable. |
--install-url <url> | Install an APK from a signed download URL. Repeatable. |
--rm | Keep the command in the foreground with the tunnel and delete the instance when you stop it with Ctrl+C. Has no effect with --no-connect, which returns right away. |
--connect / --no-connect | Open the ADB tunnel after the instance is ready. Defaults to on. |
--daemon / --daemon=false | Run the ADB tunnel in the background, or keep it in the foreground. On by default. With --rm, the tunnel stays in the foreground so the instance can be deleted when the CLI exits. |
--adb-path <path> | Use a non-default adb binary. Defaults to adb on PATH. |
--open / --no-open | Open the signed stream URL in your browser once the instance is ready. On by default. |
--record, --events, --app-logs <package> | Start a persisted session recording, event log (taps, scrolls, commands), or app log capture as soon as the instance is ready. List them with lim android recordings, lim android events, and lim android app-logs. |
--persist-ttl <duration> | How long those captures are kept. Defaults to 72h. |
Split APK groups, Chrome flags, the ClientIP and ClientLocation clues, and the Playwright sandbox (spec.sandbox.playwrightAndroid) are SDK-only. Every SDK field is described in Android spec. spec.model, spec.jurisdiction, and the ClientLocation clue are available in the TypeScript SDK and REST, not in the Python and Go SDKs. An organization inactivity default of 0 means instances are never terminated for inactivity.
Choose a connection: SDK client or ADB tunnel
There are two ways to drive the device:
- The device client (the
lim androidcommands and the TypeScript SDK'screateInstanceClient) opens a typed WebSocket session to the instance. It covers the common moves: tap by selector, screenshot, element tree, record. - The ADB tunnel exposes the emulator's
adbsocket as a local TCP listener. Anything that speaksadbattaches as if it were a USB device.
Use the device client for typed results and built-in selectors; it also runs shell commands, streams logcat, and moves files without a local adb. Use the ADB tunnel for tools that need a real adb device (Android Studio, debugger attach, scrcpy, Appium), or when you call from Go or Python.
| Capability | Device client (TypeScript SDK) | ADB tunnel |
|---|---|---|
| Screenshot | client.screenshot() returns a base64 PNG data URI | adb shell screencap -p > screen.png |
| Read UI hierarchy | client.getElementTree() returns AndroidElementNode[] plus raw XML | adb shell uiautomator dump, then parse /sdcard/window_dump.xml |
| Find element by selector | client.findElement(selector, limit?) with a typed AndroidSelector | Dump the tree, then parse the XML yourself |
| Tap by selector | client.tap({ selector }) (server-side lookup and tap) | Dump the tree, parse bounds, then adb shell input tap X Y |
| Tap by coordinates | client.tap({ x, y }) | adb shell input tap X Y |
| Type text | client.setText(target?, 'hello') | adb shell input text 'hello' |
| Press key with modifiers | client.pressKey('HOME', ['shift']) | adb shell input keyevent KEYCODE_HOME (no modifier syntax) |
| Scroll | client.scrollScreen('down', 6) or scrollElement(target, ...) | adb shell input swipe X1 Y1 X2 Y2 |
| Open URL or deep link | client.openUrl('myapp://...') | adb shell am start -a android.intent.action.VIEW -d <url> |
| Record video | client.startRecording / stopRecording with localPath or presignedUrl sinks | adb shell screenrecord /sdcard/out.mp4 (3-minute cap per file), then adb pull |
| Install APK from an HTTPS URL | client.sendAsset(url) (the instance downloads it) | Download locally, then adb install ./out.apk |
| Install APK from a local file | assets.getOrUpload({ path }), then sendAsset(asset.signedDownloadUrl) | adb install ./build.apk |
| List, launch, or stop apps | client.listApps(), client.launchApp(pkg, { mode, onExit }), client.terminateApp(pkg) | adb shell pm list packages / adb shell am start -n pkg/.Activity / adb shell am force-stop pkg |
| Logcat | client.logcat(args) streams logcat output | adb logcat |
| File push and pull | client.pushFile(path, destination?) / client.pullFile(path, localPath) | adb push local /sdcard/... / adb pull /sdcard/... |
| Run an arbitrary shell command | client.adbShell(command, args) returns stdout, stderr, and exit code | adb shell <anything> |
| Mirror the device UI | Open signedStreamUrl in a browser or embed <RemoteControl /> | scrcpy -s 127.0.0.1:<tunnel-port> |
| Attach Android Studio | Not applicable | Appears in the device selector while the tunnel runs; no pairing |
| Drive with Appium | Not applicable | Point appium:udid at 127.0.0.1:<tunnel-port> |
| Connection lifecycle | Typed getConnectionState and onConnectionStateChange with auto-reconnect | The adb server's built-in retry; adb reconnect if it loses the socket |
| Languages | TypeScript (device control and tunnel); Go: tunnel only; Python: none, use lim android connect | Any language that can run adb |
Open a device client from the TypeScript SDK
createInstanceClient opens a WebSocket to the instance. Every method on the returned client is one round trip over that socket. It needs two fields from the create response: status.apiUrl, the HTTP base the WebSocket URL is derived from, and status.token, the instance token. status.token is returned only to credentials that can control the instance; a read-only API key or a viewer seat gets none.
import { createInstanceClient } from '@limrun/api';

const client = await createInstanceClient({
  apiUrl: instance.status.apiUrl!,
  token:  instance.status.token!, // absent for read-only API keys and viewer seats
  logLevel: 'info',
});| Option | What it controls |
|---|---|
apiUrl | HTTP base for the instance. The WebSocket endpoint is apiUrl + /ws, and recording downloads use the same base. Required. |
token | Instance token. The client sends it as a token query parameter on the WebSocket URL, and as Authorization: Bearer <token> on the HTTP endpoints for files and recording downloads. Required. |
adbUrl | The instance's status.adbWebSocketUrl. Needed only to open an ADB tunnel with startAdbTunnel. |
adbPath | Path to the local adb executable used by tunnel workflows. Defaults to adb. |
logLevel | 'none' | 'error' | 'warn' | 'info' | 'debug'. Log lines are prefixed [Endpoint]. Defaults to info. |
maxReconnectAttempts | Consecutive reconnect attempts after a transient WebSocket drop before the client gives up. Defaults to 6. |
reconnectDelay | Initial backoff between reconnect attempts; each attempt doubles it, up to maxReconnectDelay. Defaults to 1000 ms. |
maxReconnectDelay | Upper bound on the backoff. Defaults to 30000 ms. |
The Go and Python SDKs have no Android device client. From those languages, drive the device through the ADB tunnel or the lim android CLI.
Open an ADB tunnel
lim android connect opens a long-lived WebSocket between your machine and the emulator's adb socket, binds it to a random 127.0.0.1 port, and runs adb connect 127.0.0.1:<port> for you. The command keeps running until you stop it with Ctrl+C, and the emulator shows up in adb devices like any networked device. lim android create opens the same tunnel unless you pass --no-connect.
# Connect to the last-created Android instance.
lim android connect

# Target a specific instance (recommended for scripts and agents).
lim android connect --id <instance-id>

# Use a non-default adb binary.
lim android connect --id <instance-id> --adb-path /path/to/platform-tools/adb
In another terminal, check the connection and run anything adb understands:
adb devices
# List of devices attached
# 127.0.0.1:49923   device

adb -s 127.0.0.1:49923 shell getprop ro.build.version.release
# 15
Tools that work over the tunnel:
- Android Studio. No pairing is needed: the tunnel already runs
adb connect, so whilelim android connect(orcreate) is running, the emulator appears in Android Studio's device selector like any adb-connected device. Run, debug, and Logcat flow through it. - scrcpy. Run
scrcpy -s 127.0.0.1:<port>to mirror and control the device. - Appium. Set
appium:udid(orappium:deviceName) to127.0.0.1:<port>with any upstream Appium driver. See Appium.
To open the tunnel from code, use client.startAdbTunnel() in TypeScript or tunnel.NewADB in Go; Appium shows both.
Reach services on your machine
To let the app on the emulator reach a mock backend, dev server, or VPN-only API on your side, start a destination tunnel with lim android tunnel. See Connect to local services.
Run shell commands and move files without a tunnel
For one-shot shell commands and file transfer, the CLI talks to the instance directly, with no local adb install and no tunnel to keep alive. Everything runs with the permissions of the ADB shell user, so protected locations are rejected just as they would be for adb.
adb-shell runs a command and returns its stdout, stderr, and exit code; the CLI exits with the command's exit code, and --timeout (milliseconds, default 30000) bounds it. Pass the command after --. Each argument is sent as a separate, quoted token, so shell features such as pipes need an explicit shell:
lim android adb-shell -- pm list packages -3
lim android adb-shell -- getprop ro.build.version.sdk
lim android adb-shell --id <instance-id> -- sh -c "dumpsys battery | grep level"
pull-file and push-file behave like adb pull and adb push:
lim android pull-file /sdcard/Download/photo.jpeg
lim android pull-file /data/local/tmp/log.txt ./device-log.txt

lim android push-file ./document.pdf /sdcard/Download/document.pdf
# Without a destination, the instance stores the file under an internal
# name and the CLI prints the remote path.
lim android push-file ./video.mp4
Install apps
Install your APK at boot, push rebuilds as patches, or install on a running instance.
Pre-install APKs
Set initialAssets at create time to install one or more APKs while the instance boots. Each APK must come from a publicly reachable HTTPS URL (a GitHub release asset, an S3 presigned URL) or from Asset Storage. After a successful installation the app launches automatically, so the instance is ready to use on first connect.
For local files, the CLI's --install and the TypeScript and Go SDKs' assets.getOrUpload({ path }) upload to Asset Storage first and hand the instance a signed URL. The Python SDK has no such helper: call assets.get_or_create, PUT the file to the returned upload URL, then create the instance. See Upload an asset.
Pre-install from a local file, an Asset Storage name, an asset ID, or a URL:
# Local APK uploaded to Asset Storage on the fly, then installed.
lim android create --install ./build.apk

# Several unrelated apps; each --install becomes its own install group.
lim android create --install ./app-a.apk --install ./app-b.apk

# Already in Asset Storage? Reference it by name instead.
lim android create --install-asset chrome-stable
const instance = await lim.androidInstances.create({
wait: true,
reuseIfExists: true,
spec: {
initialAssets: [
// One asset by name (already uploaded with assets.getOrUpload)
{ kind: 'App', source: 'AssetName', assetName: 'my-app-build.apk' },
// Direct URLs, no Asset Storage upload required
{ kind: 'App', source: 'URL',
url: 'https://example.com/builds/123.apk' },
{ kind: 'App', source: 'URLs',
urls: ['https://example.com/base.apk', 'https://example.com/config.apk'] },
// Reference by asset ID (when you already have one)
{ kind: 'App', source: 'AssetIDs',
assetIds: ['asset_01j...'] },
],
},
});instance = lim.android_instances.create(
wait=True,
reuse_if_exists=True,
spec={
"initial_assets": [
# One asset by name (already uploaded)
{"kind": "App", "source": "AssetName", "asset_name": "my-app-build.apk"},
# Direct URLs
{"kind": "App", "source": "URL",
"url": "https://example.com/builds/123.apk"},
{"kind": "App", "source": "URLs",
"urls": ["https://example.com/base.apk", "https://example.com/config.apk"]},
# Reference by asset ID
{"kind": "App", "source": "AssetIDs",
"asset_ids": ["asset_01j..."]},
],
},
)inst, _ := lim.AndroidInstances.New(ctx, limrun.AndroidInstanceNewParams{
Wait: param.NewOpt(true),
ReuseIfExists: param.NewOpt(true),
Spec: limrun.AndroidInstanceNewParamsSpec{
InitialAssets: []limrun.AndroidInstanceNewParamsSpecInitialAsset{
// One asset by name
{
Kind: "App",
Source: "AssetName",
AssetName: param.NewOpt("my-app-build.apk"),
},
// Direct URL
{
Kind: "App",
Source: "URL",
URL: param.NewOpt("https://example.com/builds/123.apk"),
},
// Multiple URLs as one install group
{
Kind: "App",
Source: "URLs",
URLs: []string{"https://example.com/base.apk", "https://example.com/config.apk"},
},
// Reference by asset ID
{
Kind: "App",
Source: "AssetIDs",
AssetIDs: []string{"asset_01j..."},
},
},
},
})The CLI installs each --install or --install-asset as its own app. In the SDKs, each initialAssets entry picks one source: an asset name, an asset ID, or a URL. The Android initialAssets entry has no launchMode field; the full entry shape is in Instance spec and status. Anything you upload once and reuse goes through Asset Storage. To push a build to an instance that is already running, see Install an APK.
Supported ABIs
Instances are x86_64 emulators that also run arm64-v8a native code through translation, so an APK built for x86_64, arm64-v8a, or both installs and runs. x86_64 runs natively and performs best; arm64-v8a lets you reuse a device build without adding an ABI to your pipeline.
Keep the ABIs consistent within one APK. If some native libraries ship only for arm64-v8a while others also ship x86_64, Android installs the app as x86_64 and the arm64-only libraries fail to load with UnsatisfiedLinkError. APKs that contain only 32-bit armeabi-v7a code are rejected at install with INSTALL_FAILED_NO_MATCHING_ABIS. Apps that execute their own bundled ARM command-line binaries, rather than loading native libraries, are not supported under translation.
Split APKs
If you ship your app as split APKs, a base.apk plus config.* APKs (config.xxhdpi.apk for screen density, config.en.apk for locale, config.arm64_v8a.apk for architecture), the whole set must install as one atomic group or the app won't run. Put the set in one entry with a plural source (AssetNames, URLs, or AssetIDs) and an array. The first file is the base APK; the rest are config splits, and the instance installs them with pm install-multiple.
Split APKs are SDK-only. Each CLI --install or --install-asset becomes its own initialAssets entry, so the set would install as separate apps instead of a group.
await lim.androidInstances.create({
  wait: true,
  spec: {
    initialAssets: [
      // From Asset Storage by name
      { kind: 'App', source: 'AssetNames',
        assetNames: ['base.apk', 'config.xxhdpi.apk', 'config.en.apk'] },

      // Or from any HTTPS URLs the instance can reach
      { kind: 'App', source: 'URLs',
        urls: [
          'https://example.com/base.apk',
          'https://example.com/config.xxhdpi.apk',
          'https://example.com/config.en.apk',
        ] },
    ],
  },
});
lim.android_instances.create(
wait=True,
spec={
"initial_assets": [
{"kind": "App", "source": "AssetNames",
"asset_names": ["base.apk", "config.xxhdpi.apk", "config.en.apk"]},
{"kind": "App", "source": "URLs",
"urls": [
"https://example.com/base.apk",
"https://example.com/config.xxhdpi.apk",
"https://example.com/config.en.apk",
]},
],
},
)inst, _ := lim.AndroidInstances.New(ctx, limrun.AndroidInstanceNewParams{
Wait: param.NewOpt(true),
Spec: limrun.AndroidInstanceNewParamsSpec{
InitialAssets: []limrun.AndroidInstanceNewParamsSpecInitialAsset{
{
Kind: "App",
Source: "AssetNames",
AssetNames: []string{"base.apk", "config.xxhdpi.apk", "config.en.apk"},
},
{
Kind: "App",
Source: "URLs",
URLs: []string{
"https://example.com/base.apk",
"https://example.com/config.xxhdpi.apk",
"https://example.com/config.en.apk",
},
},
},
},
})Use separate initialAssets entries to install unrelated apps in sequence; everything inside one entry is a single grouped install.
Set Chrome flags
To turn on an experimental Chrome feature, add an entry with kind: 'Configuration' to initialAssets. The only configuration today is ChromeFlag; the flag below lets Chrome accept command-line arguments on a non-rooted device, which Playwright needs. Chrome flags are SDK-only; the CLI has no flag for them.
{
  kind: 'Configuration',
  configuration: {
    kind: 'ChromeFlag',
    chromeFlag: 'enable-command-line-on-non-rooted-devices@1',
  },
}
{
"kind": "Configuration",
"configuration": {
"kind": "ChromeFlag",
"chrome_flag": "enable-command-line-on-non-rooted-devices@1",
},
}limrun.AndroidInstanceNewParamsSpecInitialAsset{
Kind: "Configuration",
Configuration: limrun.AndroidInstanceNewParamsSpecInitialAssetConfiguration{
Kind: "ChromeFlag",
ChromeFlag: "enable-command-line-on-non-rooted-devices@1",
},
}A Configuration entry carries an instance setting, not a file: it has no MD5, no signed URLs, and never appears in assets.list.
Sync APK rebuilds
lim android sync updates the APK on a running emulator with differential patching: it transfers an xdelta3 patch against the APK already on the instance, then installs the updated APK. You don't upload the full APK after every rebuild.
First, upload a base APK to Asset Storage. The asset name defaults to the filename:
lim asset push ./app-debug.apkPre-install that base APK when you create each emulator:
lim android create --install-asset app-debug.apkAfter rebuilding the APK locally or in a cloud development environment, sync it to the last-created Android instance:
lim android sync ./app-debug.apkPass --id <instance-id> to target a specific instance, and --watch to keep watching the APK file and sync each new build. --no-install pushes the patch without installing, and --launch-mode ForegroundIfRunning|RelaunchIfRunning sets what happens after the install. Without --id, the command uses the most recent Android instance and creates one if needed.
Install on a running instance
Install a local APK or one from a URL. Local files are uploaded to Asset Storage first, and the instance downloads URLs itself, so a URL must be publicly reachable (a GitHub release asset, an S3 presigned URL) or come from Asset Storage:
# Local path: uploaded to Asset Storage first, then installed.
lim android install-app ./build.apk

# Remote URL: the instance downloads it.
lim android install-app https://example.com/build.apk --id <instance-id>
// Local file: upload once, then install with the returned signed URL.
const asset = await lim.assets.getOrUpload({ path: './build.apk' });
await client.sendAsset(asset.signedDownloadUrl);
// Or install straight from a public URL.
await client.sendAsset('https://example.com/build.apk');
// The default request timeout is 120 s. Pass a longer one for large APKs.
await client.sendAsset(asset.signedDownloadUrl, 180_000);CLI only: install-app uploads local paths MD5-deduplicated, and --asset-ttl sets their expiry. In TypeScript, sendAsset(url) tells the instance to download an APK and install it; for a local file, upload it with assets.getOrUpload({ path }) and pass the returned signedDownloadUrl.
sendAsset is TypeScript-only. The Go SDK uploads with Assets.GetOrUpload; from Go and Python, install with lim android install-app or adb install over the tunnel. Python has no upload helper: call assets.get_or_create and PUT the file to the upload URL first.
Read the screen
Inspect the device with screenshots and the element tree. The TypeScript examples assume a client from createInstanceClient.
Take a screenshot
screenshot captures the current frame as a PNG and saves it to screen.png:
lim android screenshot screen.png
lim android screenshot screen.png --id <instance-id>
import { writeFileSync } from 'node:fs';
const shot = await client.screenshot();
// { dataUri: 'data:image/png;base64,iVBORw0K...' }
const png = Buffer.from(shot.dataUri.replace(/^data:image\/\w+;base64,/, ''), 'base64');
writeFileSync('screen.png', png);The CLI writes the image to the path you give it. In TypeScript, screenshot() returns a base64 data URI that you decode yourself.
Get the element tree
Read the UI hierarchy as raw UIAutomator XML or as parsed nodes:
# Print the raw XML.
lim android element-tree

# Or get the parsed nodes as JSON (easier for agents to filter).
lim android element-tree --json
const tree = await client.getElementTree();
// tree.xml raw UIAutomator XML
// tree.nodes flattened AndroidElementNode[]A node in the raw tree.xml looks like this:
<?xml version='1.0' encoding='UTF-8' standalone='yes' ?>
<hierarchy rotation="0">
  <!-- ...ancestors elided... -->
  <node index="3"
        text="Chrome"
        resource-id=""
        class="android.widget.TextView"
        package="app.lawnchair"
        content-desc="Chrome"
        checkable="false"
        checked="false"
        clickable="true"
        enabled="true"
        focusable="true"
        focused="false"
        scrollable="false"
        long-clickable="true"
        password="false"
        selected="false"
        bounds="[533,1222][706,1422]" />
</hierarchy>
The same node in tree.nodes carries parsed bounds with a center point you can tap:
{
  "index": "3",
  "text": "Chrome",
  "resourceId": "",
  "className": "android.widget.TextView",
  "packageName": "app.lawnchair",
  "contentDesc": "Chrome",
  "clickable": true,
  "enabled": true,
  "focusable": true,
  "focused": false,
  "scrollable": false,
  "selected": false,
  "bounds": "[533,1222][706,1422]",
  "parsedBounds": {
    "left": 533, "top": 1222, "right": 706, "bottom": 1422,
    "centerX": 619, "centerY": 1322
  }
}
Record the screen
Recording runs on the instance and writes H.264 in an MP4 container. Start a recording, drive the UI, then stop it:
lim android record start --quality 5

# ...drive the UI...

# Download to a local file (default: a timestamped MP4 in the current directory).
lim android record stop -o demo.mp4

# Or hand the bytes to a presigned upload URL.
lim android record stop --presigned-url https://example.com/upload
await client.startRecording({ quality: 5 });
// ...drive the UI...
const url = await client.stopRecording({ localPath: '/tmp/demo.mp4' });
// The download URL is also returned so you can fetch it again later.quality accepts the integers 5 through 10; the default is 5, and higher values increase bitrate and file size. In TypeScript, pick the sink that matches where the file should live:
- Local file.
stopRecording({ localPath }). The SDK streams the file tolocalPathbefore resolving. - Your bucket.
stopRecording({ presignedUrl }). The instance PUTs directly to your URL; the SDK only waits for that upload. - Just the URL.
stopRecording({}). Resolves with the download URL; fetch the bytes later withAuthorization: Bearer ${status.token}.
Control the device
Input actions take an AndroidElementTarget, which carries either a selector or explicit coordinates:
type AndroidElementTarget = {
  selector?: AndroidSelector;
  x?: number;
  y?: number;
};
Prefer selectors. Layouts shift between OS versions, and coordinates don't survive that.
Find elements
findElement queries the tree so you don't have to parse it. Every non-empty selector field must match:
# Find by text and return up to 5 matches as JSON.
lim android find-element --text "Sign In" --limit 5 --json

# Find by resource ID; returns up to 20 matches by default.
lim android find-element --resource-id com.example:id/submit

# Only enabled, clickable buttons.
lim android find-element --class-name android.widget.Button --clickable --enabled
const r = await client.findElement({ text: 'Chrome' }, 5);
// { count: 1, elements: [ { ... AndroidElementNode } ] }The same selector fields work for find-element, tap-element, type, and scroll:
| SDK field | CLI flag | Matches |
|---|---|---|
resourceId | --resource-id <value> | The android:id/... resource string. The most stable selector. |
text | --text <value> | Visible text. Case-sensitive exact match. |
contentDesc | --content-desc <value> | Accessibility content description. |
className | --class-name <value> | Widget class (android.widget.Button, androidx.viewpager.widget.ViewPager). |
packageName | --package-name <value> | Owning app package. Scopes queries when the launcher is in front. |
index | --index <n> | Sibling index. |
clickable | --clickable / --no-clickable | Clickable nodes only. |
enabled | --enabled / --no-enabled | Skip disabled controls. |
focused | --focused / --no-focused | The currently focused control. |
boundsContains | --bounds-contains-x <n> --bounds-contains-y <n> | The deepest node whose bounds contain that pixel. |
Tap, type, and press keys
Tap by selector first and fall back to coordinates. type writes into the focused field unless you target an input by selector or coordinates. press-key sends hardware and IME keys, with --modifier repeatable:
# Tap by selector (preferred). Any selector flag from the table above works.
lim android tap-element --resource-id com.example.app:id/login
lim android tap-element --text "Sign In"

# Tap by raw coordinates (fallback).
lim android tap 374 219

# Type into the focused field, or into a specific input.
lim android type "hello"
lim android type "docs sandbox" --class-name android.widget.EditText
lim android type "hello" --x 120 --y 340

# Hardware and IME keys.
lim android press-key HOME
lim android press-key BACK
lim android press-key enter
lim android press-key a --modifier shift
// Tap by selector (preferred)
await client.tap({ selector: { resourceId: 'com.example.app:id/login' } });
await client.tap({ selector: { text: 'Chrome' } });
// Tap by coordinates (fallback)
await client.tap({ x: 374, y: 219 });
// Type into the focused field, or into a specific input
await client.setText(undefined, 'hello');
await client.setText(
{ selector: { className: 'android.widget.EditText' } },
'docs sandbox',
);
// Hardware and IME keys
await client.pressKey('HOME'); // returns { key: 'KEYCODE_HOME' }
await client.pressKey('BACK');
await client.pressKey('ENTER');
await client.pressKey('a', ['shift']); // modifiers: shift, ctrl/control, alt/option, meta/command/cmd, sym, fnpressKey accepts plain names (BACK, ENTER, A, TAB), digit strings ('4'), or full KEYCODE_* constants. The response echoes the resolved keycode so you can confirm what fired.
Scroll
scrollScreen swipes from the center of the screen. scrollElement scrolls inside a specific scrollable node such as a list, ViewPager, or ScrollView; on the CLI, pass selector flags or coordinates to lim android scroll. Both take a direction (up, down, left, right) and an amount in Android scroll units.
# Scroll the screen. --amount defaults to 300 in the CLI.
lim android scroll down --amount 500
lim android scroll up

# Scroll inside a specific element by selector or coordinates.
lim android scroll down --resource-id com.example:id/list --amount 500
lim android scroll up --x 120 --y 500 --amount 250
// The SDK amount defaults to 6.
await client.scrollScreen('down', 6);
await client.scrollScreen('up');
await client.scrollScreen('left', 4);
await client.scrollElement(
{ selector: { className: 'android.widget.ScrollView' } },
'down',
3,
);The TypeScript call resolves with the gesture's start and end points, so you can check what was sent:
{ "direction": "down", "startX": 360, "startY": 808, "endX": 360, "endY": 1108 }The SDK defaults amount to 6 (a small flick) and the CLI to 300 (a long scroll). The value on the wire is the same, so pass the same number to both for identical behavior.
Open URLs
openUrl resolves the intent the way am start -a android.intent.action.VIEW -d <url> would. It works for web URLs and registered deep-link schemes:
lim android open-url https://example.com
lim android open-url myapp://orders/42 --id <instance-id>
await client.openUrl('https://example.com'); // opens in the default browser
await client.openUrl('myapp://orders/42'); // routes to your app's deep-link handlerIf no installed activity matches the intent, the call fails with startActivity returned code -91 (Android's ActivityManager.START_INTENT_NOT_RESOLVED). That covers unregistered custom schemes (myapp://...) and standard schemes whose handler isn't on the base image: on the stock image mailto: fails because there is no mail app, while tel: and https:// succeed because the dialer and Chrome are present. Install the missing handler with Pre-install APKs at boot, or install it on the running instance.
Launch and stop apps
Launch an installed app by package name, then stop it. Mode ForegroundIfRunning (the default) brings a running app to the front; RelaunchIfRunning restarts it:
lim android launch-app com.example.app
lim android launch-app com.example.app --detach
lim android launch-app com.example.app --mode RelaunchIfRunning --id <instance-id>
lim android terminate-app com.example.app
const apps = await client.listApps();
// [{ bundleId: 'com.example.app', name, installType: 'user' | 'system', icon? }, ...]
await client.launchApp('com.example.app', {
mode: 'RelaunchIfRunning',
onExit: (logs, info) => {
console.log(info.reason, info.crash);
for (const line of logs) console.log(line);
},
});
const watch = await client.watchApp('com.example.app', (logs, info) => console.log(info.reason));
await watch.stop();
await client.terminateApp('com.example.app'); // force-stop; fires onExit with reason 'terminated'CLI only: launch-app watches the app until it exits. When the app crashes, stops responding (ANR), or stops, the CLI prints the exit reason, crash details, and a recent log tail; --detach returns right after the launch.
TypeScript only: onExit receives the app's recent logcat lines and exit details, including the crash stack trace when the app crashed. watchApp attaches the same callback to an app you didn't launch through the client, for example one opened by a deep link. listApps returns the package name as bundleId so the shape matches iOS.
Read logs
lim android app-log reads logcat output for one installed app: the last 100 lines by default, --tail <n> for another count, or --follow to keep streaming:
lim android app-log com.example.app --tail 50
lim android app-log com.example.app --follow
logcat runs logcat on the instance with no local adb. Arguments go to logcat verbatim: -d or -t 50 dumps and exits, -T 50 follows, and no arguments dumps the buffer and follows:
# Arguments after -- go to logcat.
lim android logcat -- -t 50
lim android logcat -- -T 50 *:E
lim android logcat --id <instance-id> -- -s MyTag
const proc = client.logcat(['-T', '50']);
proc.on('line', (line) => console.log(line));
// ...
proc.stop();The CLI exits with logcat's exit code. In TypeScript, logcat returns a process that emits line (and batched lines) events and an exit event with the exit code, or -1 when stopped.
The SDK equivalents of adb-shell, push-file, and pull-file are adbShell(command, args, { timeoutMs }), pushFile(path, destination?), and pullFile(path, localPath). adbShell quotes each argument, so run pipes through an explicit shell: client.adbShell('sh', ['-c', 'dumpsys battery | grep level']). A non-zero exit code is returned in the result, not thrown.
Simulate the camera, microphone, and network
Play a local video file as the camera feed. Apps see it through their regular Camera2 or CameraX pipeline, and the file's audio track plays through the microphone in sync. The video loops unless you pass --no-loop, which plays it once and freezes on the last frame. Camera injection needs Android 15, the default --os-version; the SDK throws on Android 14 and older:
lim android camera play ./fixtures/qr-scan.mp4
lim android camera clear
Play a local WAV or MP3 file as microphone input. The CLI pushes the file with adb, so it needs adb locally (--adb-path to override); --once plays it once instead of looping:
lim android play-on-microphone ./sample.wav --onceLimit Wi-Fi bandwidth in Kbps. Omit a direction to leave it unchanged, and pass 0 to clear that direction's limit:
lim android set-wifi-bandwidth --down-kbps 1000 --up-kbps 500The TypeScript SDK methods are setCameraVideo(path, { loop }), clearCameraVideo(), playOnMicrophone(path, { once }) for a file already on the instance (upload it with pushFile), and setWifiBandwidth({ downKbps, upKbps }).
Trust a CA certificate
Add a CA certificate to the emulator's trust stores, for example the root of a private CA that signs your test servers. The file holds one PEM-encoded CA certificate; anything else is rejected:
lim android ca add ./my-ca.pemThe CLI prints the certificate's file name in the system store and its SHA-256 fingerprint. Apps, WebViews, and the Chrome browser trust the CA on their next connection, without a restart, and it stays trusted for the life of the instance. Apps that pin their own certificates still reject it.
To see the HTTP and HTTPS traffic an app sends to the destinations you tunnel, use tunnel inspection instead. It decodes HTTPS with a CA the emulator already trusts, so you need no CA of your own.
In the TypeScript SDK, addCaCertificate(pem) takes the PEM text and resolves to { filename, sha256 }. It needs a device client opened with adbUrl.
Manage the connection
The TypeScript client exposes lifecycle hooks for long-running drivers and connection debugging. It pings the WebSocket every 30 seconds and reports state changes through a callback. Call keepAlive for an explicit application-level ping (during a long idle stretch, or before a known network transition), and use getConnectionState and onConnectionStateChange to observe the connection:
client.getConnectionState();
// 'connecting' | 'connected' | 'disconnected' | 'reconnecting'

const unsubscribe = client.onConnectionStateChange((state) => {
  console.log('state →', state);
});

client.keepAlive();    // explicit application-level ping
The client reconnects on transient failures with exponential backoff (defaults: 6 attempts, 1 s base, 30 s cap).
disconnect closes the WebSocket cleanly and turns off auto-reconnect. It does not delete the instance; the emulator keeps running until its inactivity or hard timeout fires:
client.disconnect();
unsubscribe();         // drop the state callback if you no longer need it
Delete the emulator
Each Android instance is single-tenant: only one client should drive it at a time. Scope instances per user, per PR, or per session with labels, let reuseIfExists return the same warm instance on the next call, and delete instances explicitly when you're done.
List instances, then delete one, or every instance that matches a label:
lim android list                       # ready instances (--all for every state)
lim android list --label-selector user=alice
lim android delete <instance-id>       # delete a specific instance
lim android delete                     # delete the last-created instance
// One instance
await lim.androidInstances.delete(instance.metadata.id);
// Every ready instance matching a label
for await (const inst of lim.androidInstances.list({
labelSelector: `user=${userId}`,
state: 'ready',
})) {
await lim.androidInstances.delete(inst.metadata.id);
}# One instance
lim.android_instances.delete(instance.metadata.id)
# Every ready instance matching a label
params = {"label_selector": f"user={user_id}", "state": "ready"}
while page := lim.android_instances.list(**params).items:
for inst in page:
lim.android_instances.delete(inst.metadata.id)
# Page by hand: the iterator stops after the first page.
params["starting_after"] = page[-1].metadata.id// One instance
if err := lim.AndroidInstances.Delete(ctx, inst.Metadata.ID); err != nil {
panic(err)
}
// Every ready instance matching a label
// Page by hand: ListAutoPaging panics on instance lists.
params := limrun.AndroidInstanceListParams{
LabelSelector: param.NewOpt("user=" + userID),
State: param.NewOpt("ready"),
}
for {
page, err := lim.AndroidInstances.List(ctx, params)
if err != nil {
panic(err)
}
if len(page.Items) == 0 {
break
}
for _, inst := range page.Items {
if err := lim.AndroidInstances.Delete(ctx, inst.Metadata.ID); err != nil {
panic(err)
}
}
params.StartingAfter = param.NewOpt(page.Items[len(page.Items)-1].Metadata.ID)
}The inactivity timeout fires when nobody talks to the instance for that long; the hard timeout fires regardless. Set both to your tolerance for orphaned instances.
Troubleshooting
| Symptom or message | Cause | Fix |
|---|---|---|
startActivity returned code -91 from open-url | No installed activity handles the URL scheme. | Install the handler app, or register the scheme in your app. See Open URLs. |
INSTALL_FAILED_NO_MATCHING_ABIS | The APK contains only 32-bit armeabi-v7a code. | Build for x86_64, arm64-v8a, or both. See Supported ABIs. |
UnsatisfiedLinkError at runtime | Some native libraries ship only for arm64-v8a while others also ship x86_64, so Android installs the app as x86_64. | Ship every native library for the same set of ABIs. |
| A split APK app installs but won't start | The base and config APKs were installed as separate apps. | Put the whole set in one initialAssets entry with a plural source. See Split APKs. |
adb devices doesn't list the emulator | The tunnel isn't running, or it stopped. | Run lim android connect --id <instance-id> and keep it running. |
adb devices shows the emulator as offline | The tunnel's WebSocket closed. | Restart lim android connect, or call adb reconnect. |
| The instance is gone when you come back | Its inactivity or hard timeout fired. | Pass a longer --inactivity-timeout or spec.inactivityTimeout, up to the 24h maximum. |
Next steps
Build with Gradle
Build the APK remotely and install it on this emulator.
Appium
Point any upstream Appium driver at the ADB tunnel for native or hybrid tests.
Connect to local services
Let the app on the emulator reach services on your machine or VPN.
Embed a device
Stream the live emulator into your web app with <RemoteControl />.
Was this guide helpful?