# Claude Code on the web
URL: /docs/agents/claude-code-web
LLM index: /llms.txt
Description: Give every Claude Code session on the web what it needs to build and run your iOS app on Limrun.
# Claude Code on the web
Claude Code on the web runs each session on a Linux VM with no access to macOS, so it cannot run Xcode or the iOS Simulator on its own. Set up one cloud environment with the `lim` CLI, the Limrun skills, and your API key. From then on, Claude builds your iOS app on Limrun's Macs from any of your repositories and runs it on a simulator you open in your browser.
## Set up the environment
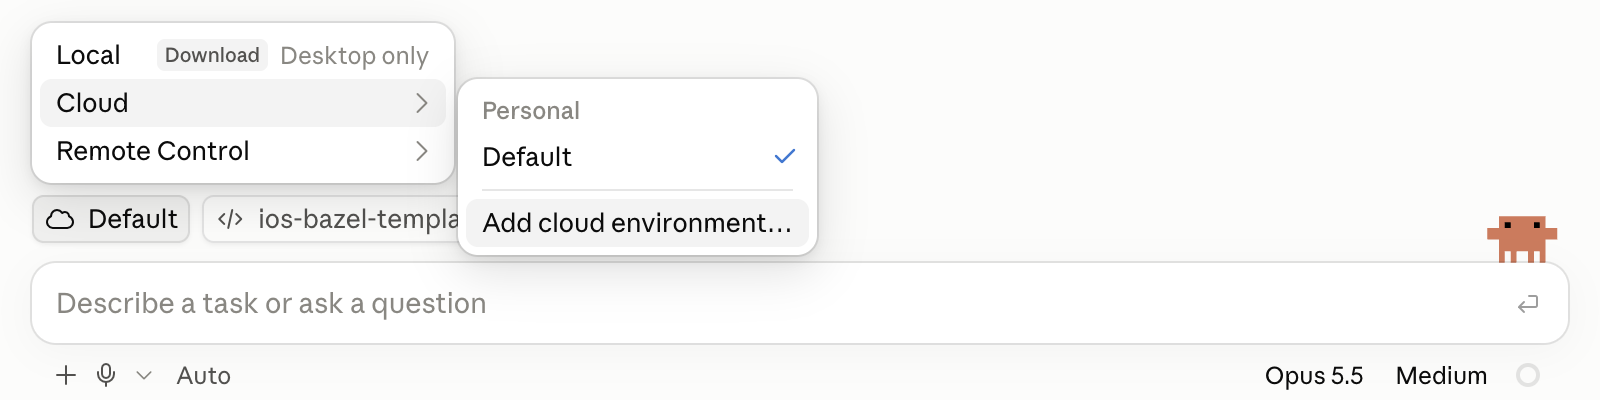
Open [claude.ai/code](https://claude.ai/code). In the environment menu below the prompt box, choose **Cloud**, then **Add cloud environment**.
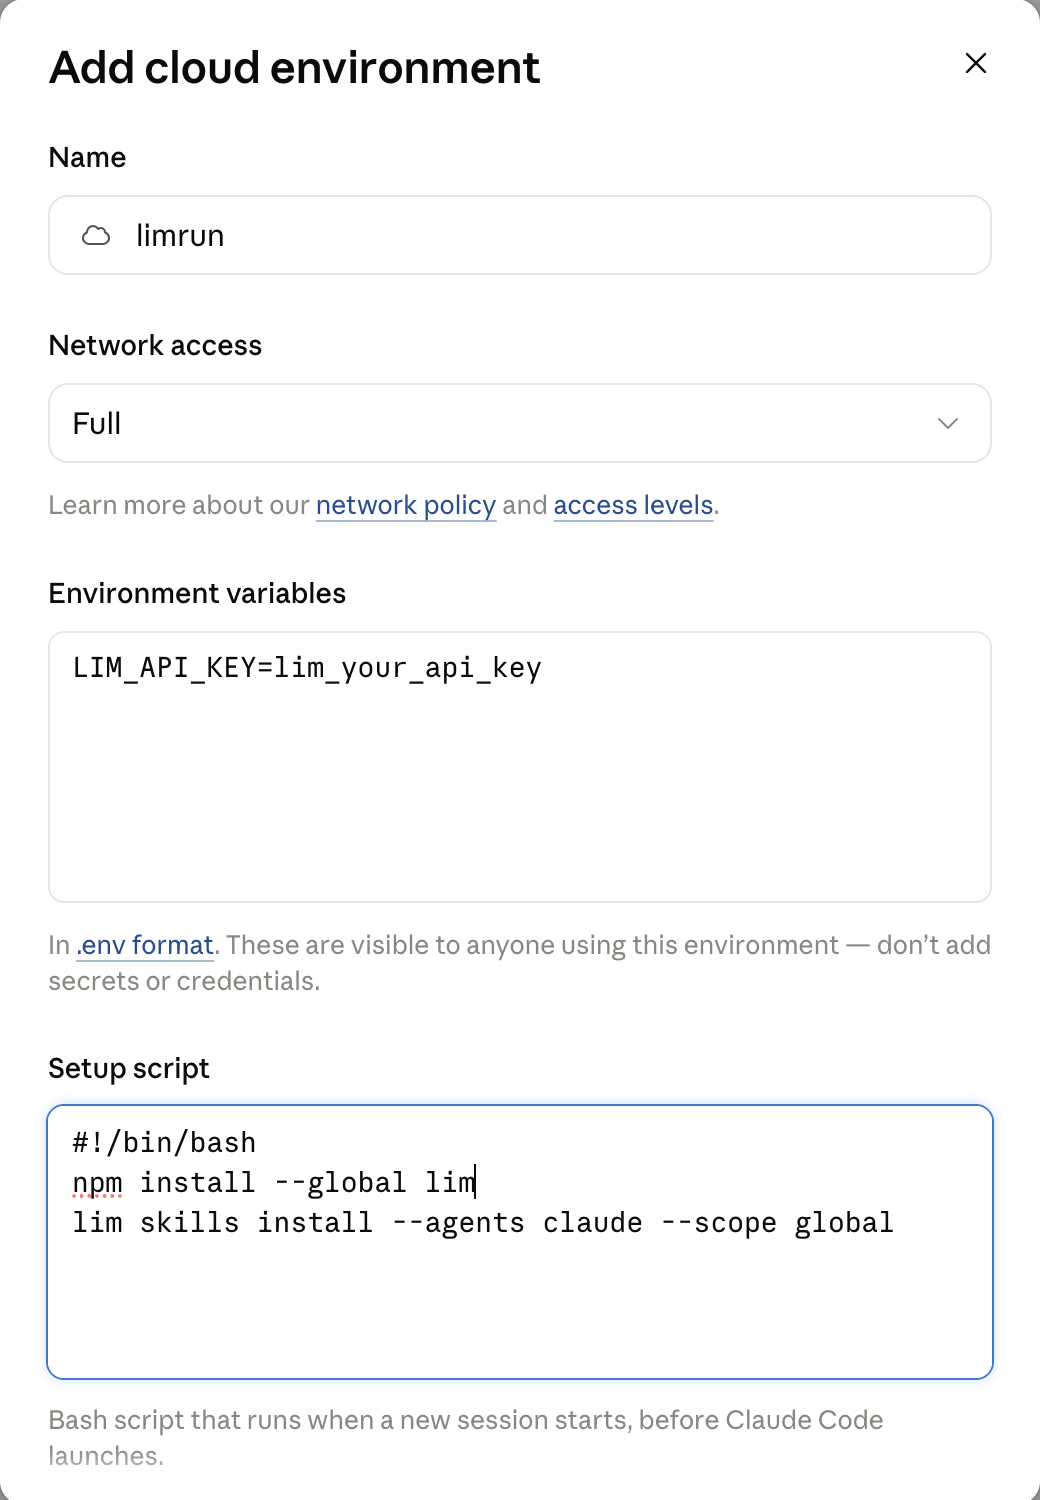
 Create an API key for this environment first: open [console.limrun.com/settings](https://console.limrun.com/settings), go to **API Keys**, and click **Create Token**. Then fill in the dialog:
- **Name**: `limrun`.
- **Network access**: **Full**. To allow only specific domains instead, see [Restrict network access](#restrict-network-access).
- **Environment variables**: your key.
```text
LIM_API_KEY=lim_...
```
- **Setup script**: installs the `lim` CLI, then every Limrun skill into `~/.claude/skills`, so Claude has the skills in any repository, including ones that do not commit them. It runs at the start of every session, before Claude Code launches.
```bash
#!/bin/bash
npm install --global lim
lim skills install --agents claude --scope global
```
Create an API key for this environment first: open [console.limrun.com/settings](https://console.limrun.com/settings), go to **API Keys**, and click **Create Token**. Then fill in the dialog:
- **Name**: `limrun`.
- **Network access**: **Full**. To allow only specific domains instead, see [Restrict network access](#restrict-network-access).
- **Environment variables**: your key.
```text
LIM_API_KEY=lim_...
```
- **Setup script**: installs the `lim` CLI, then every Limrun skill into `~/.claude/skills`, so Claude has the skills in any repository, including ones that do not commit them. It runs at the start of every session, before Claude Code launches.
```bash
#!/bin/bash
npm install --global lim
lim skills install --agents claude --scope global
```
 Anyone who can use the environment can read its variables. Use a key created only for this environment, and delete it in the console if the environment is ever shared more widely than you intended. Sharing the environment with your organization makes the key visible to every member who can use it.
Click **Add environment**. Below the prompt box, pick the `limrun` environment and your repository, then ask Claude to build and run your app:
```text
Build this app with Limrun and show it to me on an iOS simulator.
```
## How sessions behave
- **Claude picks the build path from the skills.** The `limrun-xcode` skill covers `xcodebuild` projects and `limrun-xcode-bazel` covers Bazel workspaces.
- **Asking to see the app attaches a simulator.** From then on, every successful build installs and relaunches the app on it, and Claude's reply links to the live simulator, which you can tap and type in from your browser.
- **Instances outlive the session.** The Xcode sandbox and the simulator stay up until your organization's inactivity timeout deletes them. To stop them right away, ask Claude to clean up before you close the session.
- **Each new session sets up again.** The setup script runs at the start of every session, and Claude starts the build setup over.
## Restrict network access
**Full** network access is the simplest setup. To use **Custom** instead, keep the default allowlist enabled, since it covers package registries such as npm that the setup script needs, and add Limrun's domains:
```text
*.limrun.com
*.limrun.net
```
Then add the hosts your own build downloads dependencies from. If a step fails with a network error, add the host it tried to reach and start a new session. For how the levels work, see [Anthropic's network access documentation](https://code.claude.com/docs/en/cloud-environments).
## Next steps
Build a template app, change it with Claude, and review it in a pull request preview.
The loop the skills run, and how to set them up in other agents.
Remote `xcodebuild` builds for projects without Bazel.
Remote build execution for Bazel workspaces.
Anyone who can use the environment can read its variables. Use a key created only for this environment, and delete it in the console if the environment is ever shared more widely than you intended. Sharing the environment with your organization makes the key visible to every member who can use it.
Click **Add environment**. Below the prompt box, pick the `limrun` environment and your repository, then ask Claude to build and run your app:
```text
Build this app with Limrun and show it to me on an iOS simulator.
```
## How sessions behave
- **Claude picks the build path from the skills.** The `limrun-xcode` skill covers `xcodebuild` projects and `limrun-xcode-bazel` covers Bazel workspaces.
- **Asking to see the app attaches a simulator.** From then on, every successful build installs and relaunches the app on it, and Claude's reply links to the live simulator, which you can tap and type in from your browser.
- **Instances outlive the session.** The Xcode sandbox and the simulator stay up until your organization's inactivity timeout deletes them. To stop them right away, ask Claude to clean up before you close the session.
- **Each new session sets up again.** The setup script runs at the start of every session, and Claude starts the build setup over.
## Restrict network access
**Full** network access is the simplest setup. To use **Custom** instead, keep the default allowlist enabled, since it covers package registries such as npm that the setup script needs, and add Limrun's domains:
```text
*.limrun.com
*.limrun.net
```
Then add the hosts your own build downloads dependencies from. If a step fails with a network error, add the host it tried to reach and start a new session. For how the levels work, see [Anthropic's network access documentation](https://code.claude.com/docs/en/cloud-environments).
## Next steps
Build a template app, change it with Claude, and review it in a pull request preview.
The loop the skills run, and how to set them up in other agents.
Remote `xcodebuild` builds for projects without Bazel.
Remote build execution for Bazel workspaces.